In this document I will show you how to enable CANlib in Visual Studio 2017 when creating a C++ project. I will show how to create WIN32 and WIN64 applications. I will also show how to handle the platform-settings: x86 and x64. When this is done, you can use the same project (source code) for creating WIN32 and WIN64 applications without editing your code. The instructions in this document can also be used when enabling CANlib in an existing project.
Developer Blog
Using CANlib Visual Studio 2017 C++
Abbreviations
VS2017Microsoft Visual Studio 2017 (C++)
CANlib Kvaser CANlib SDK www.kvaser.com/download
Before we start ...
First we must download and install “Kvaser CANlib SDK“ and also “Kvaser Drivers for Windows”. When CANlib is installed, please check your hard-drive and identify where Kvaser CANlib has been installed.
On my 64-bit Windows machine it is installed here:
c:\Program Files (x86)\Kvaser\Canlib\INC\canlib.h
c:\Program Files (x86)\Kvaser\Canlib\Lib\MS\canlib32.lib
c:\Program Files (x86)\Kvaser\Canlib\Lib\x64\canlib32.lib
Please remember where you found them as you will need this information soon.
Now we are ready to start Visual Studio 2017 (C++).
(I have used “Microsoft Visual Studio Professional 2017” when creating this text.)
Creating an empty project
Creating a project in VS2017 can be done in many different ways; this is one way to do it.
Select “File” – “New” -”Project…”

I chose to create a Windows Console App, Visual C++
Edit the name and the rest of unique information and press “OK”.
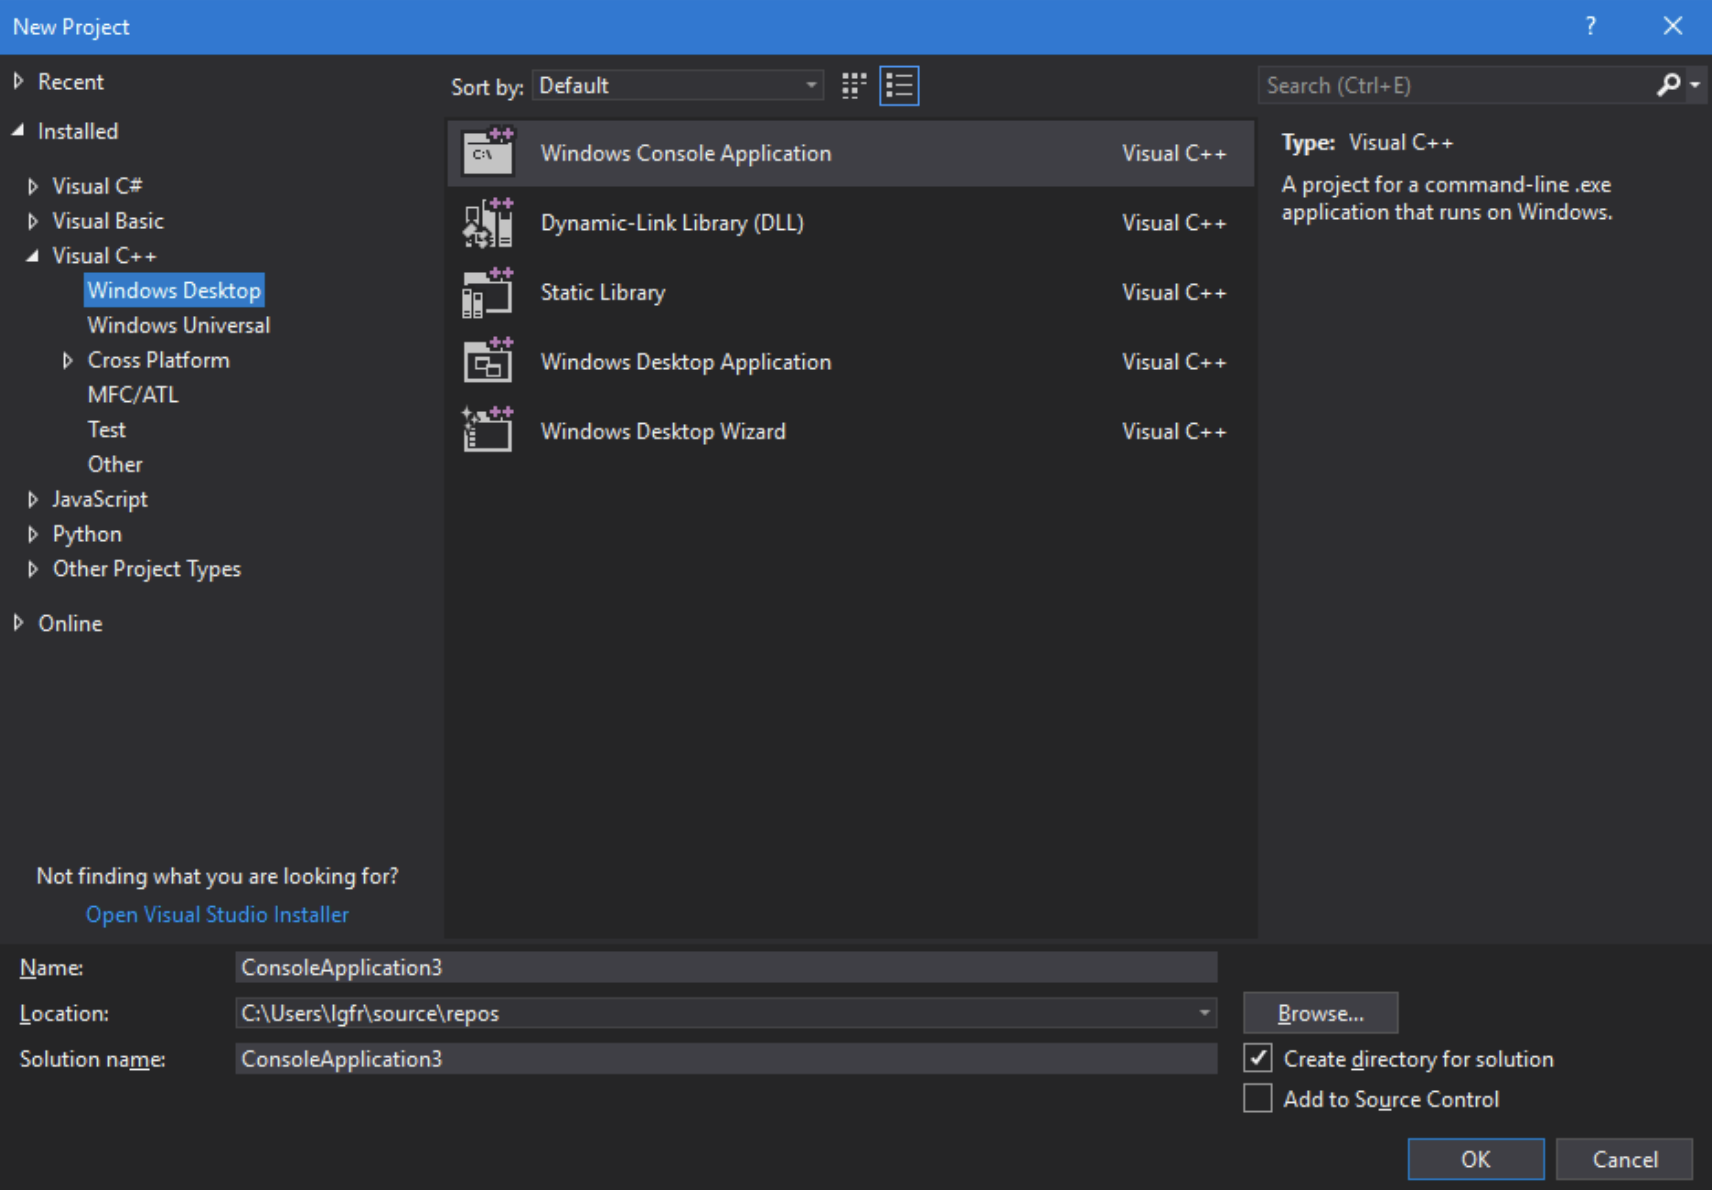
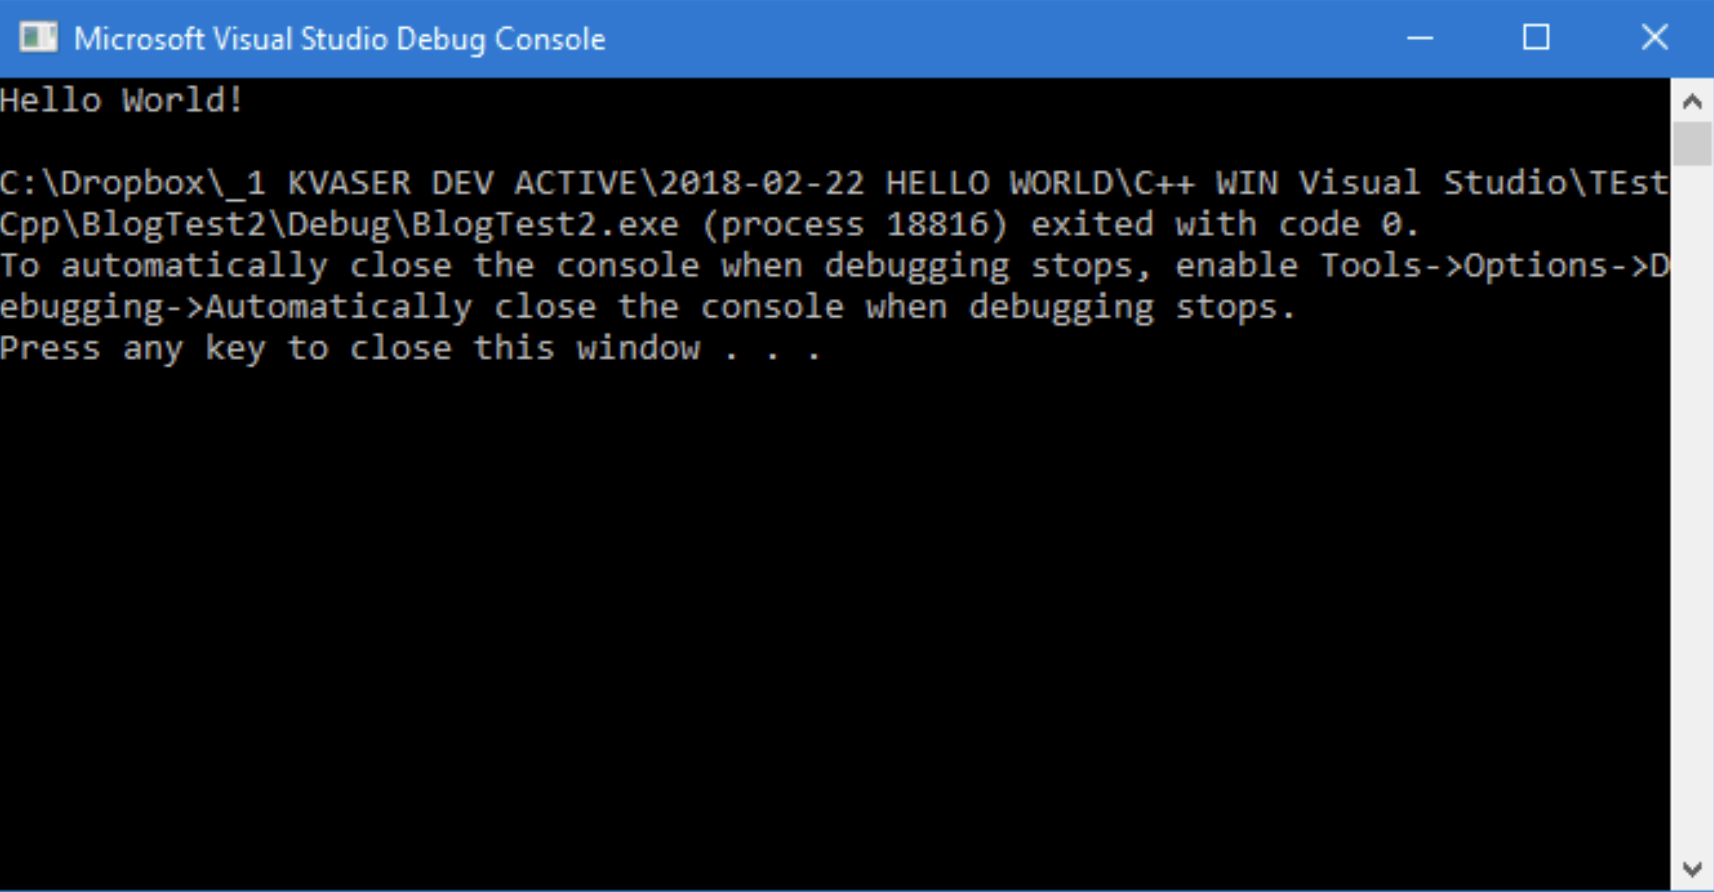
Now VS2017 creates an application for us.
It is a bit boring, only an empty console that does almost nothing.
Adding some code that uses CANlib (C++)
I will now add some code that uses CANlib. Exactly what it does is not important in this example. For more information about how to use CANlib, please check CANlib SDK Help.
Add some code inside the “main()”.
int main()
{
	canStatus R;
	int number_of_channels;

	printf("%s\n", "HelloWorld C++ Builder (c)2018 Kvaser AB");

	canInitializeLibrary();

	unsigned int V0 = canGetVersionEx(canVERSION_CANLIB32_PRODVER32);

	printf("%s %d.%d\n", "Found CANLib version", (V0 & 0xFF0000) >> 16, (V0 & 0xFF00) >> 8);

	R = canGetNumberOfChannels(&number_of_channels);
	printf("%s %d %s\n", "Found", number_of_channels, "channels");

	R = canUnloadLibrary();	printf("If you can read this, everything worked! (Press any key)");
	getchar();
	return 0;
}
When trying to run the application, I get multiple errors. Something is wrong and VS2017 cannot find CANlib.
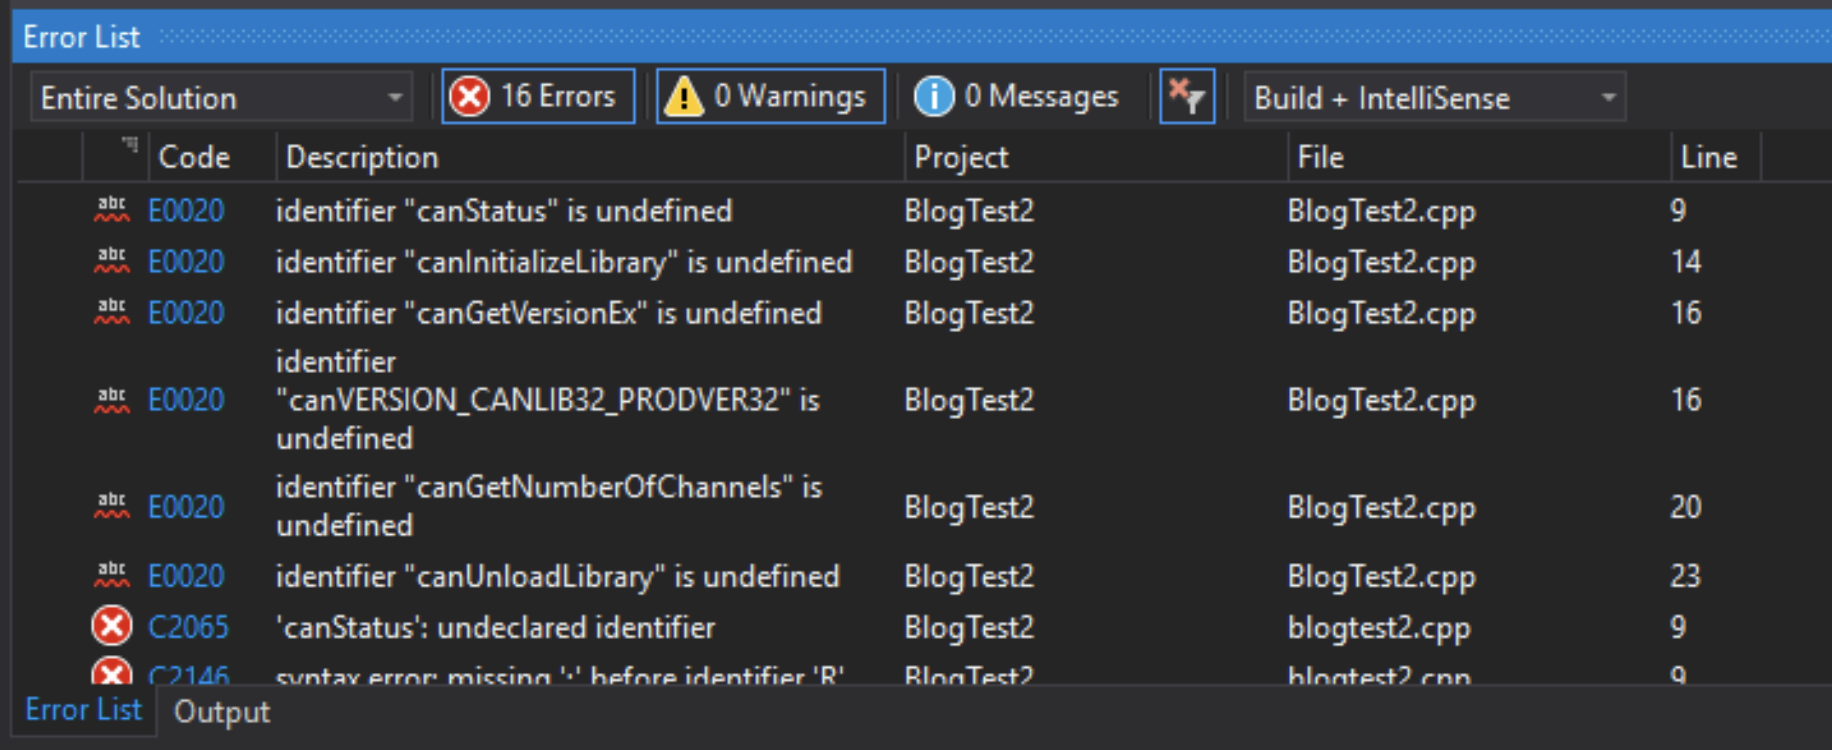
This is correct behavior for this application as we need to add information so VS2017 can find CANlib. See section 5: ‘Add CANlib to project’.
Add CANlib to project
We need to do five things to be able to build our project:
- Add the LIB name “canlib32.lib”
- Add path to INC (…\Kvaser\Canlib\INC\canlib.h)
- Add path to LIB (x86) (…\Kvaser\Canlib\Lib\MS\canlib32.lib)
- Add path to LIB (x64) (…\Kvaser\Canlib\Lib\x64\canlib32.lib)
- Add #include “canlib.h”
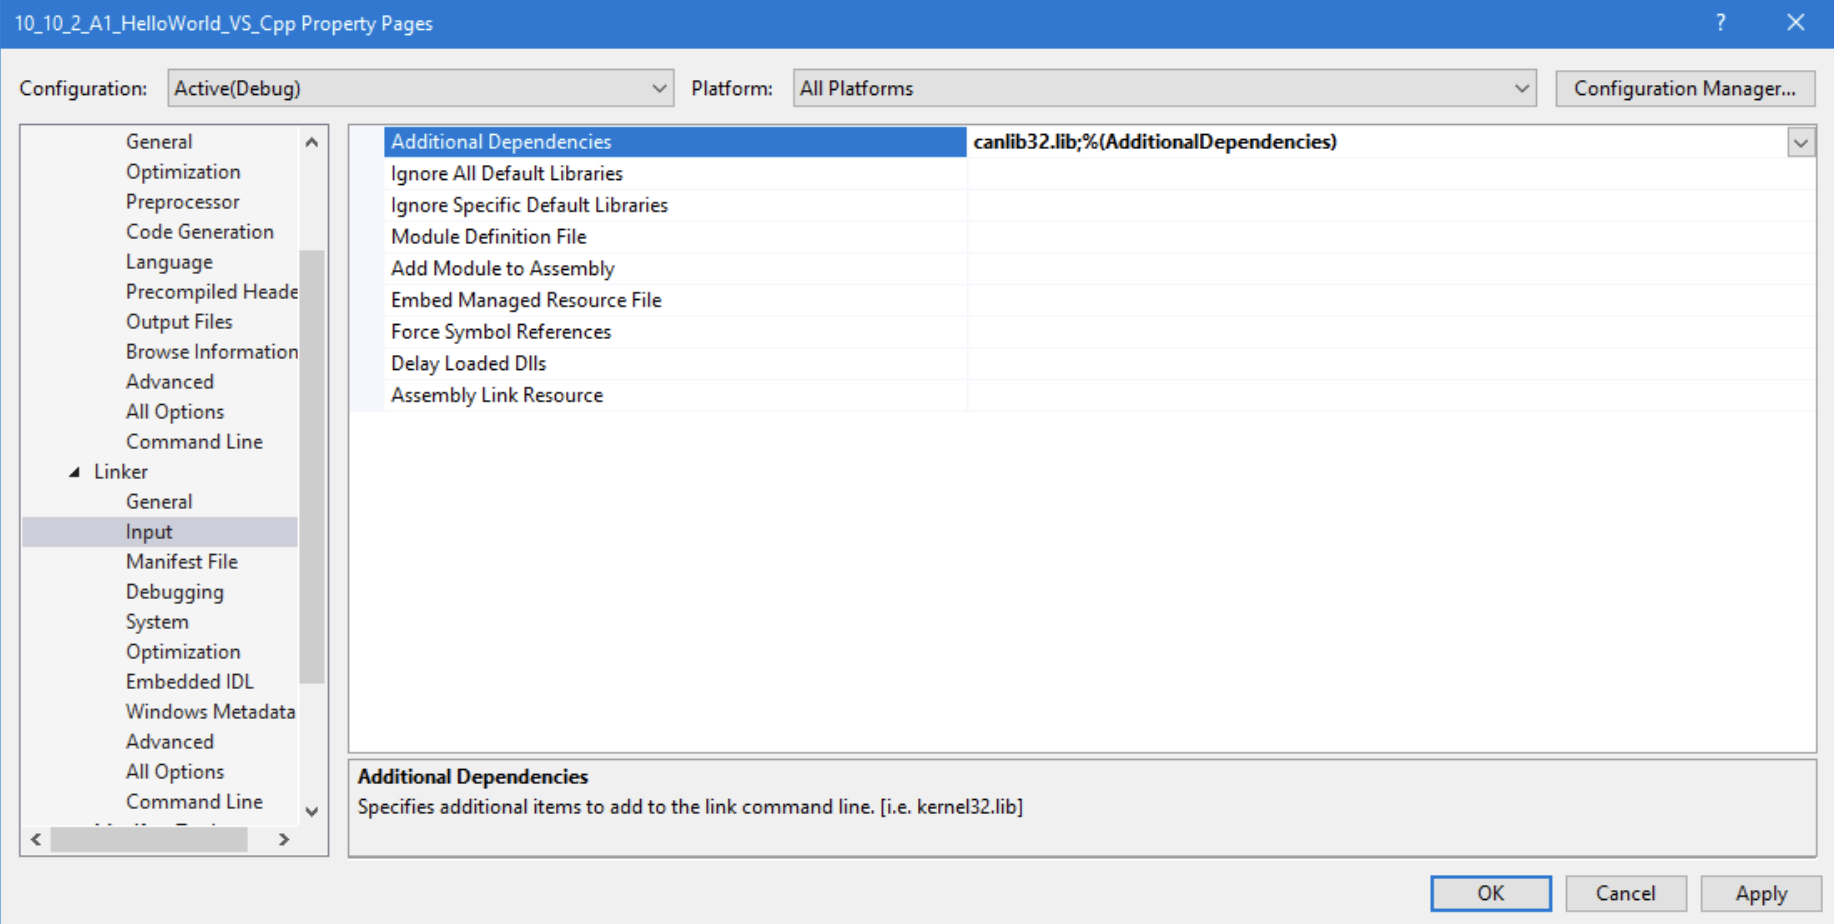
Add the LIB name “canlib32.lib”
Open menu:
Project > Properties > Configuration properties > Linker > Input > Additional Dependencies
- Select Configuration: ”All Configurations”
- Select Platform: “All Platforms”
Add the text “canlib32.lib”. You only need to type it, no browsing.
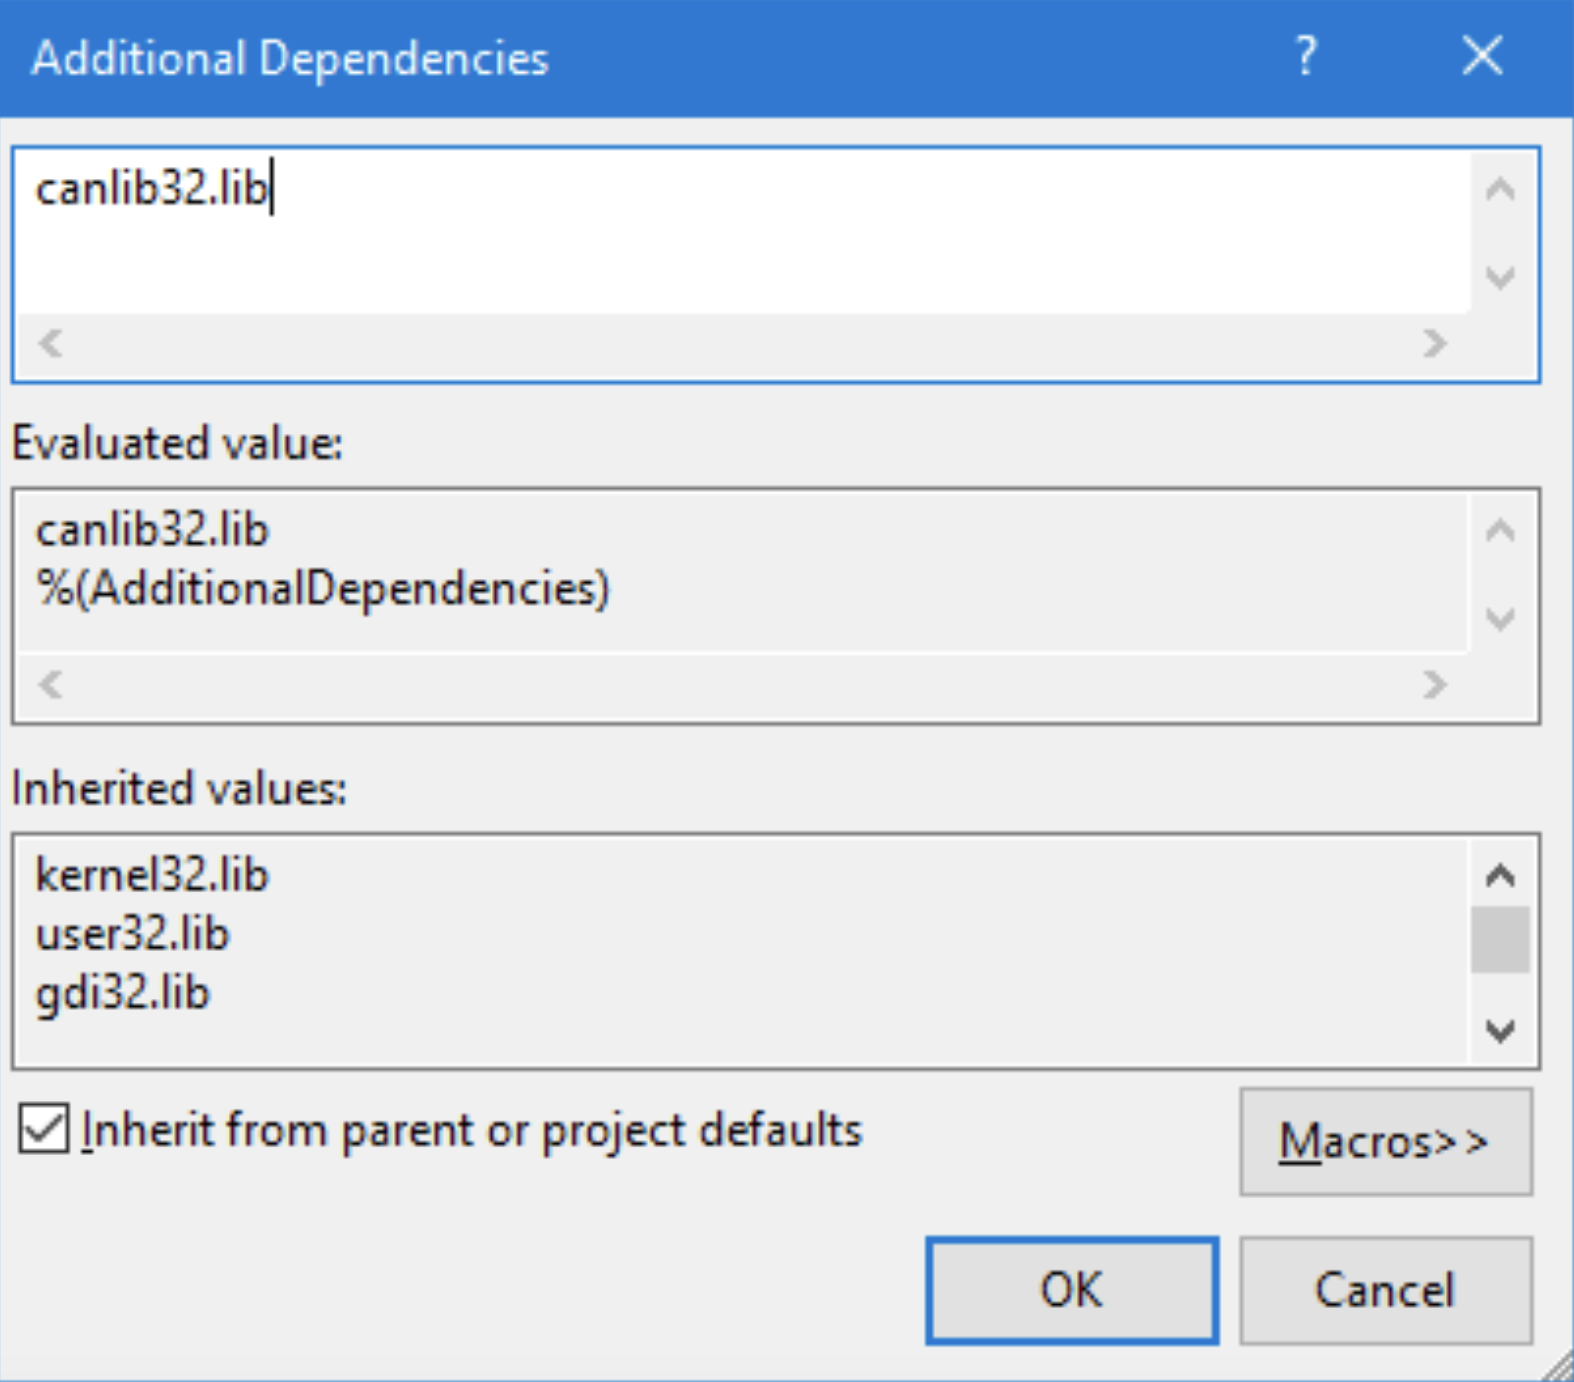
Result:
Add path to INC
Open menu:
Project > Properties > Configuration properties > C++ > General > Additional Include Directories
- Select Configuration: ”All Configurations”
- Select Platform: “All Platforms”
Edit “Additional Include Directories”
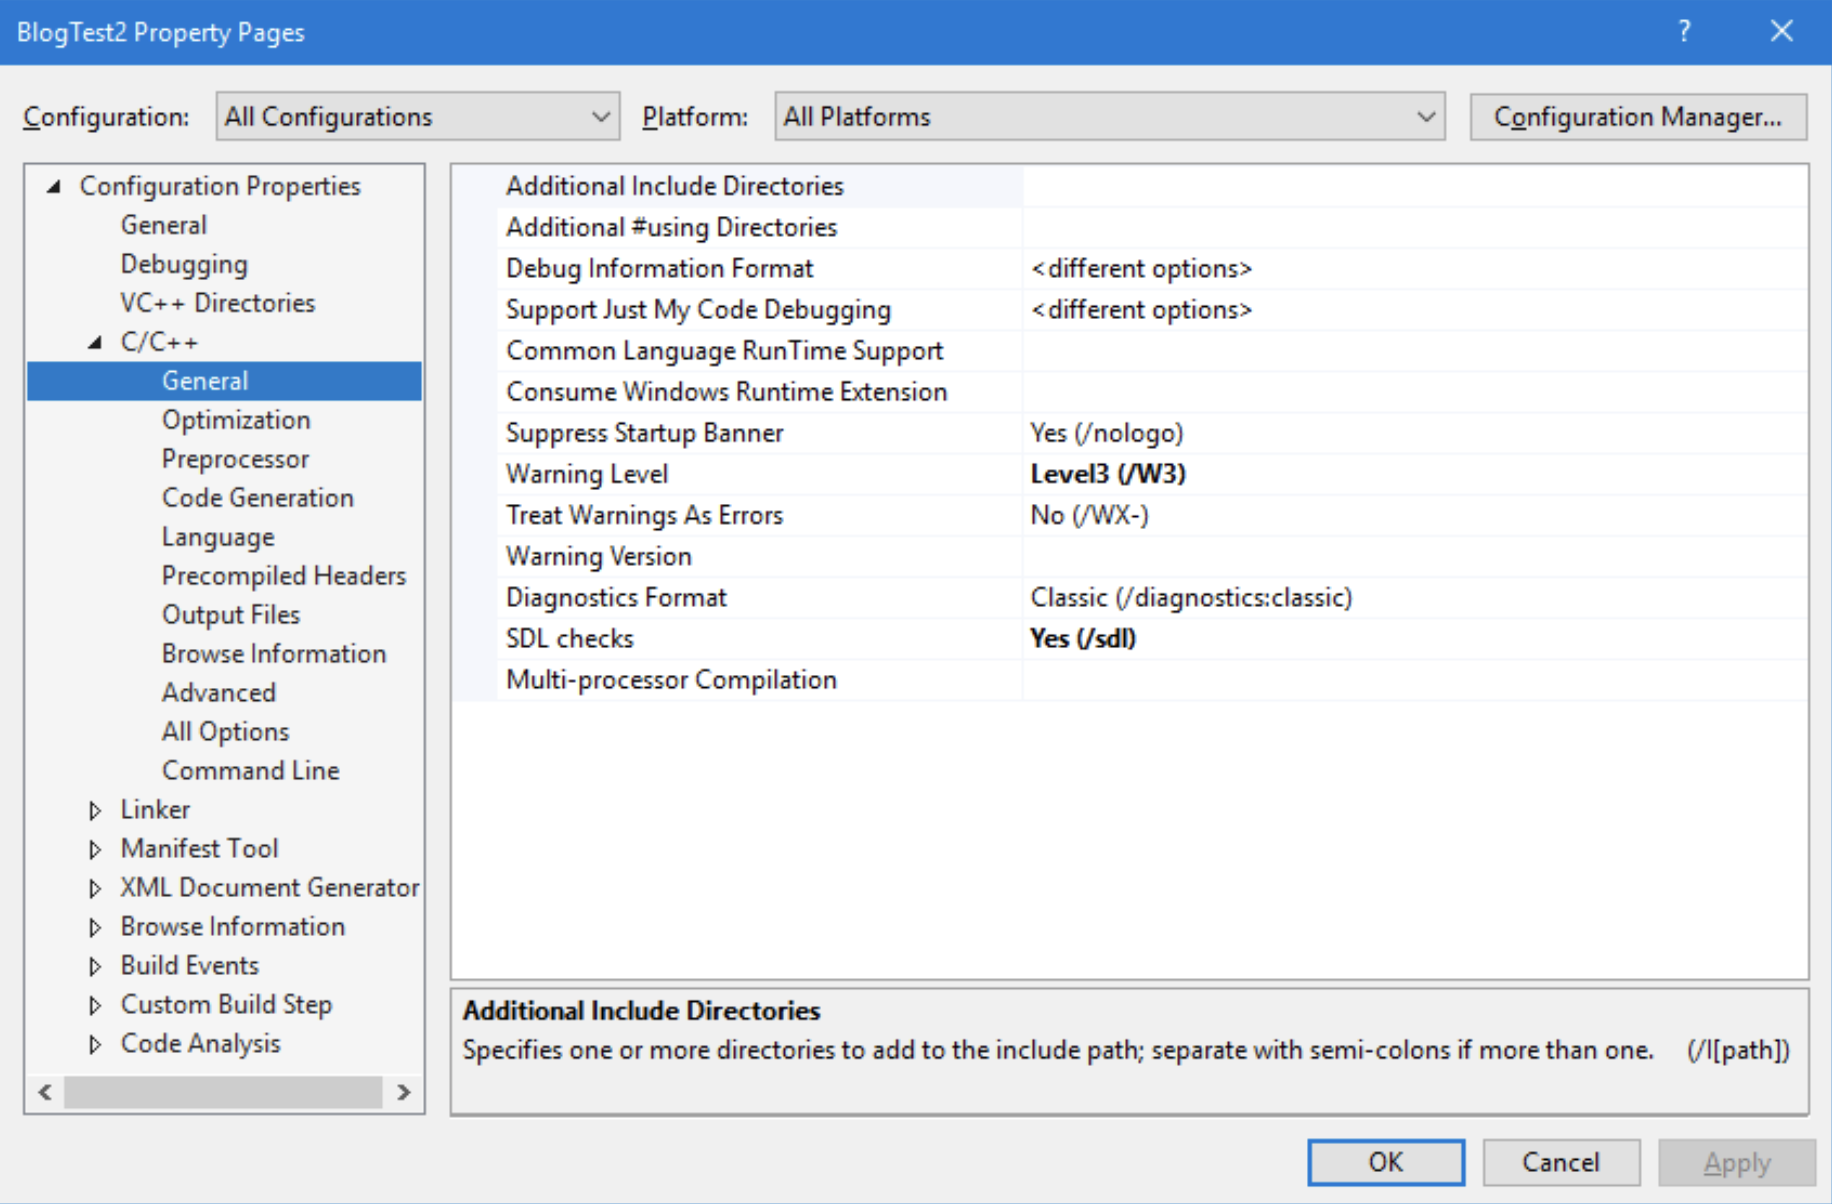
Add :”c:\Program Files (x86)\Kvaser\Canlib\INC”
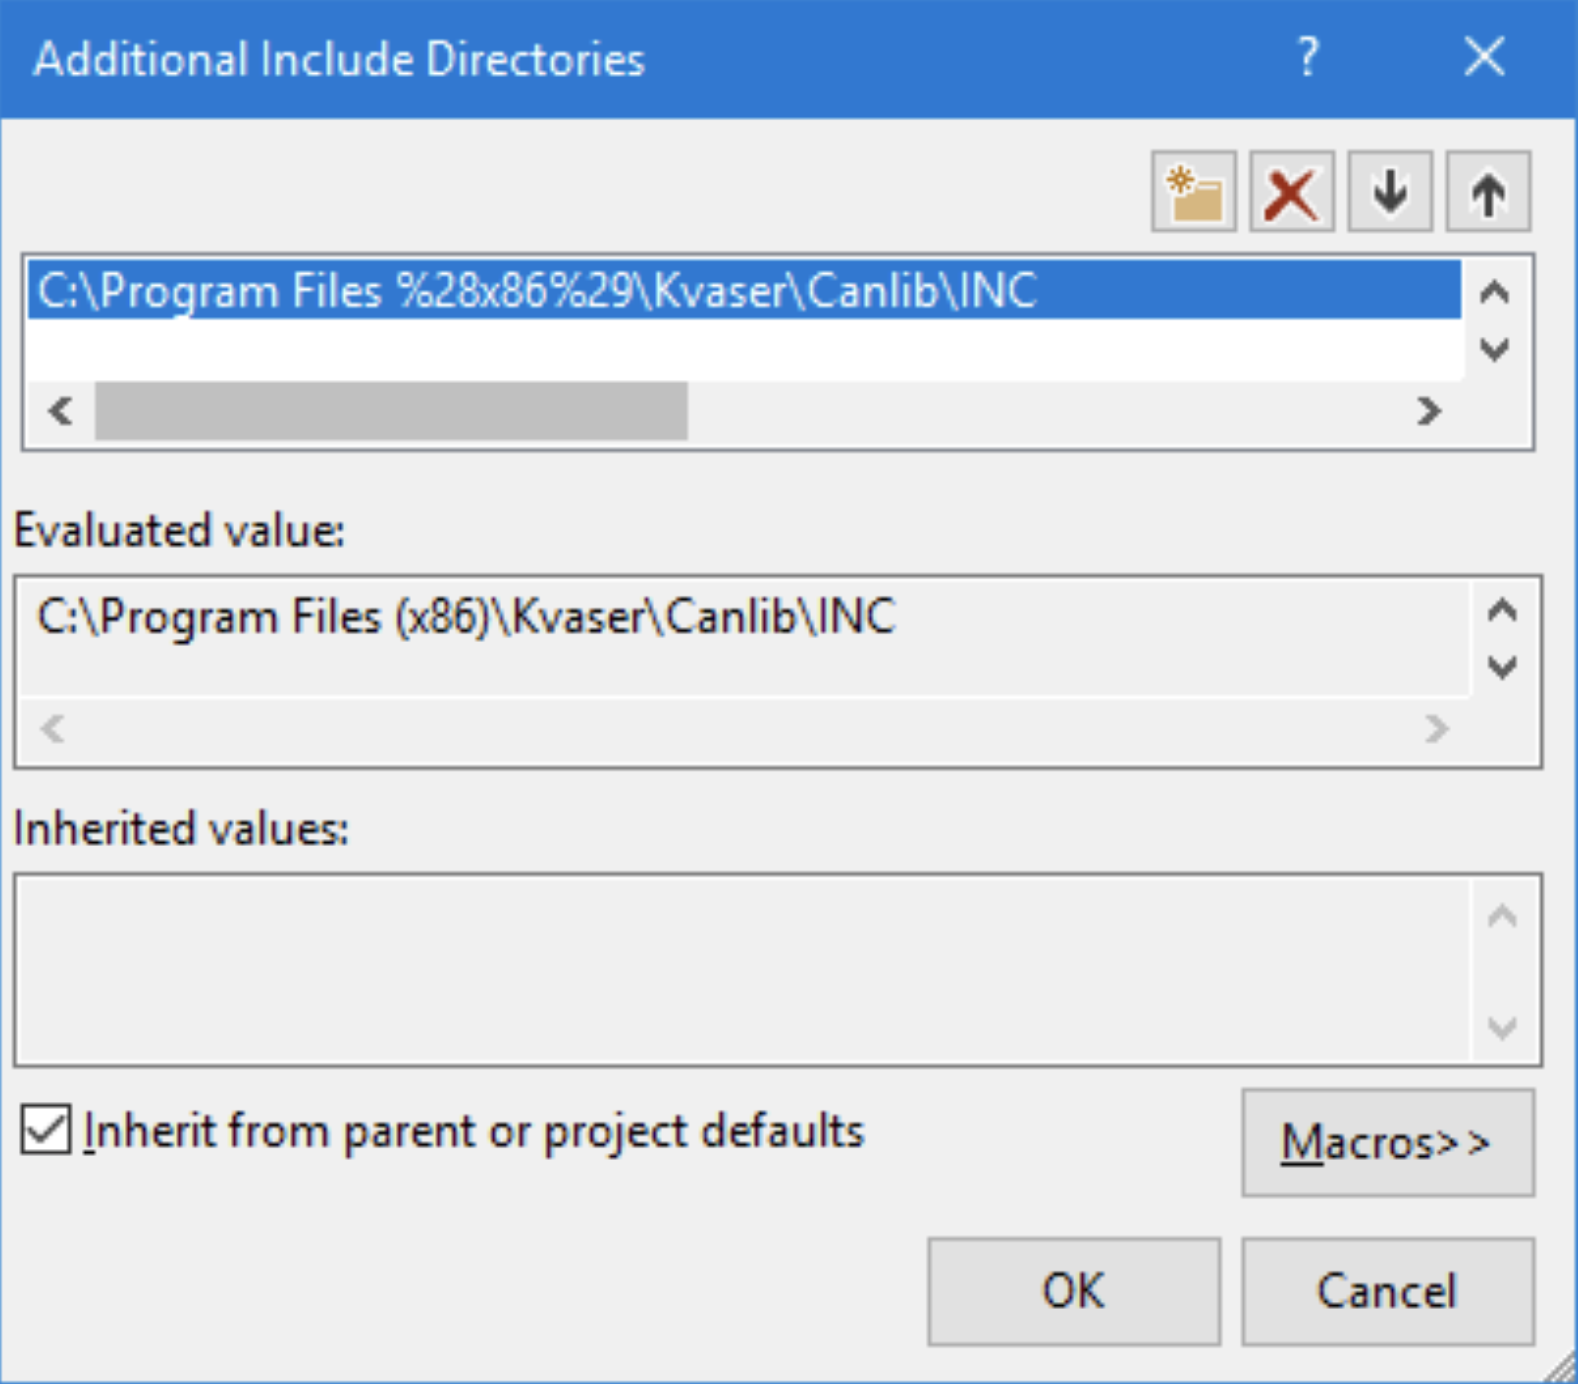
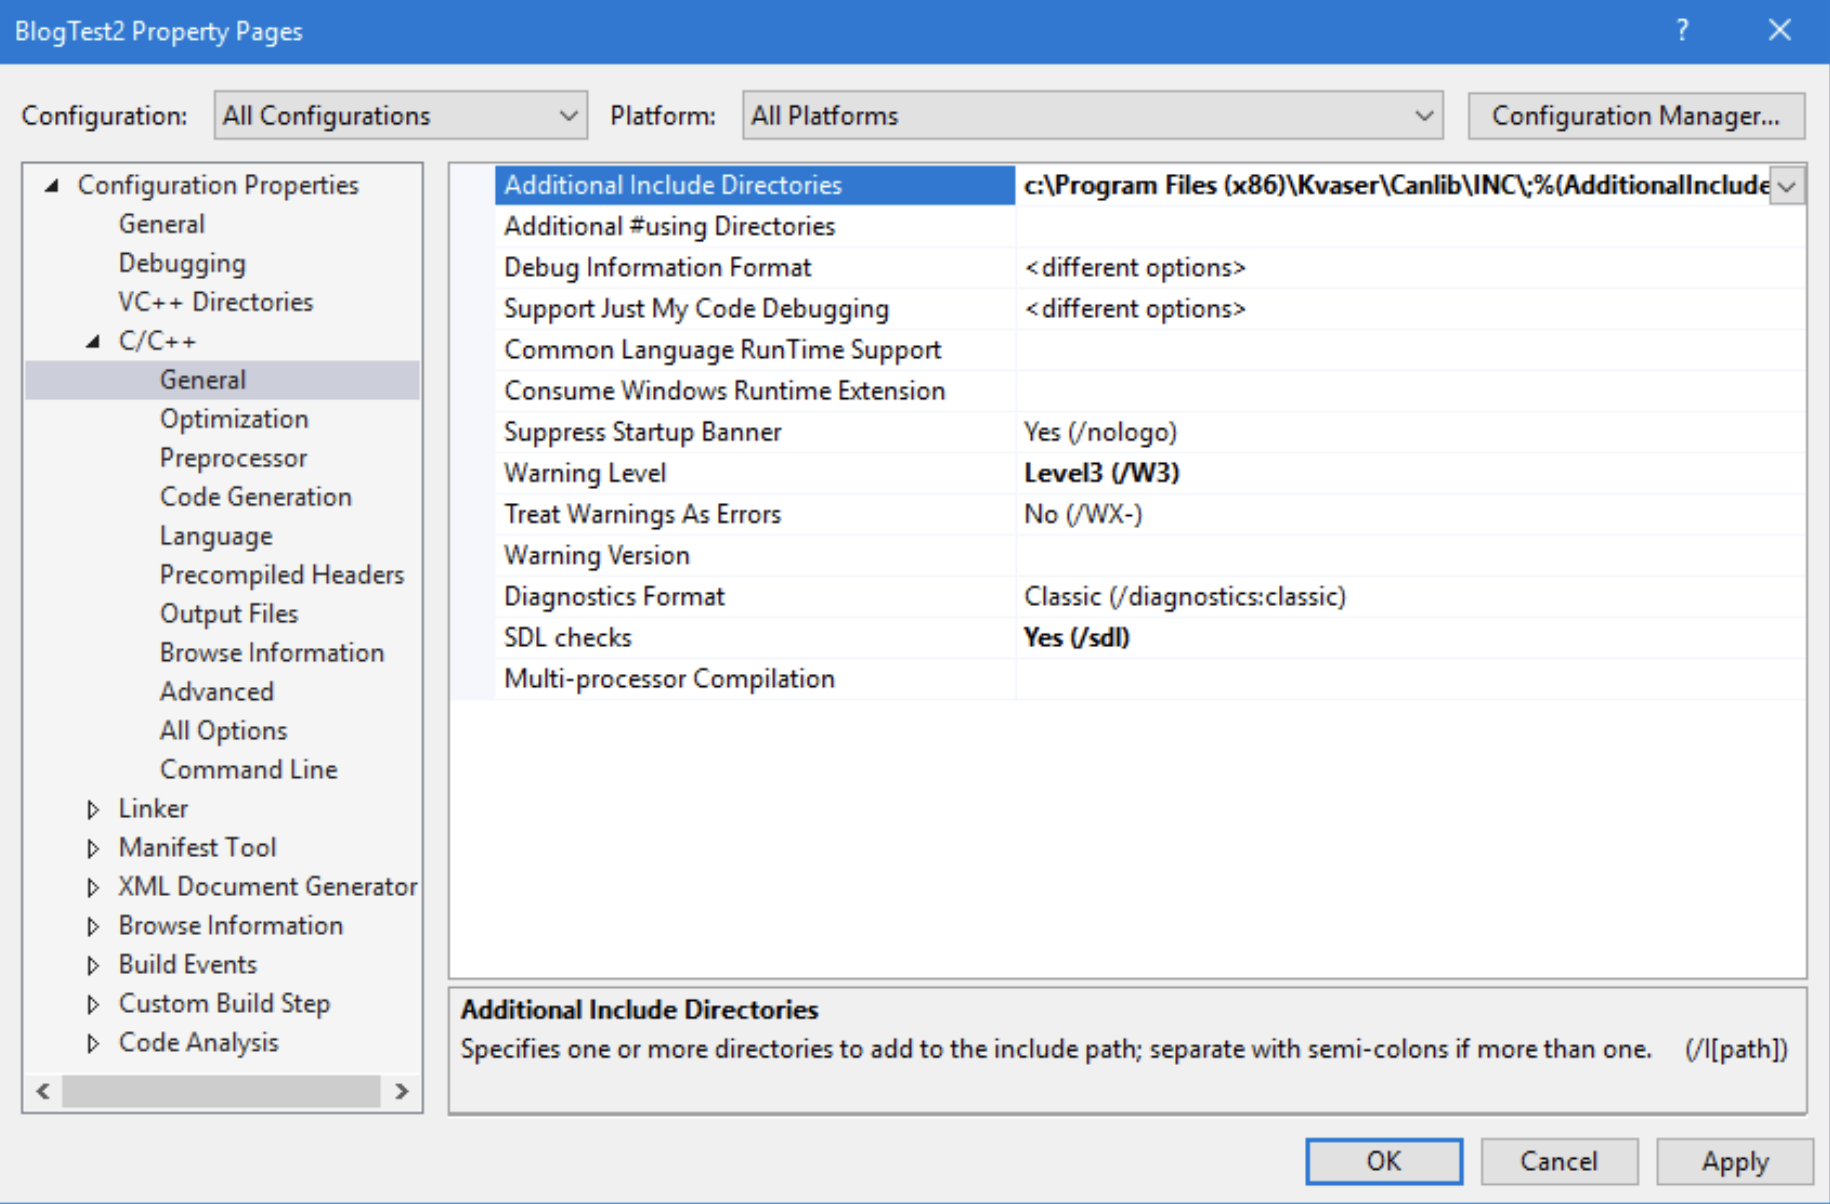
Result:
Add path to LIB (x86)
Open menu:
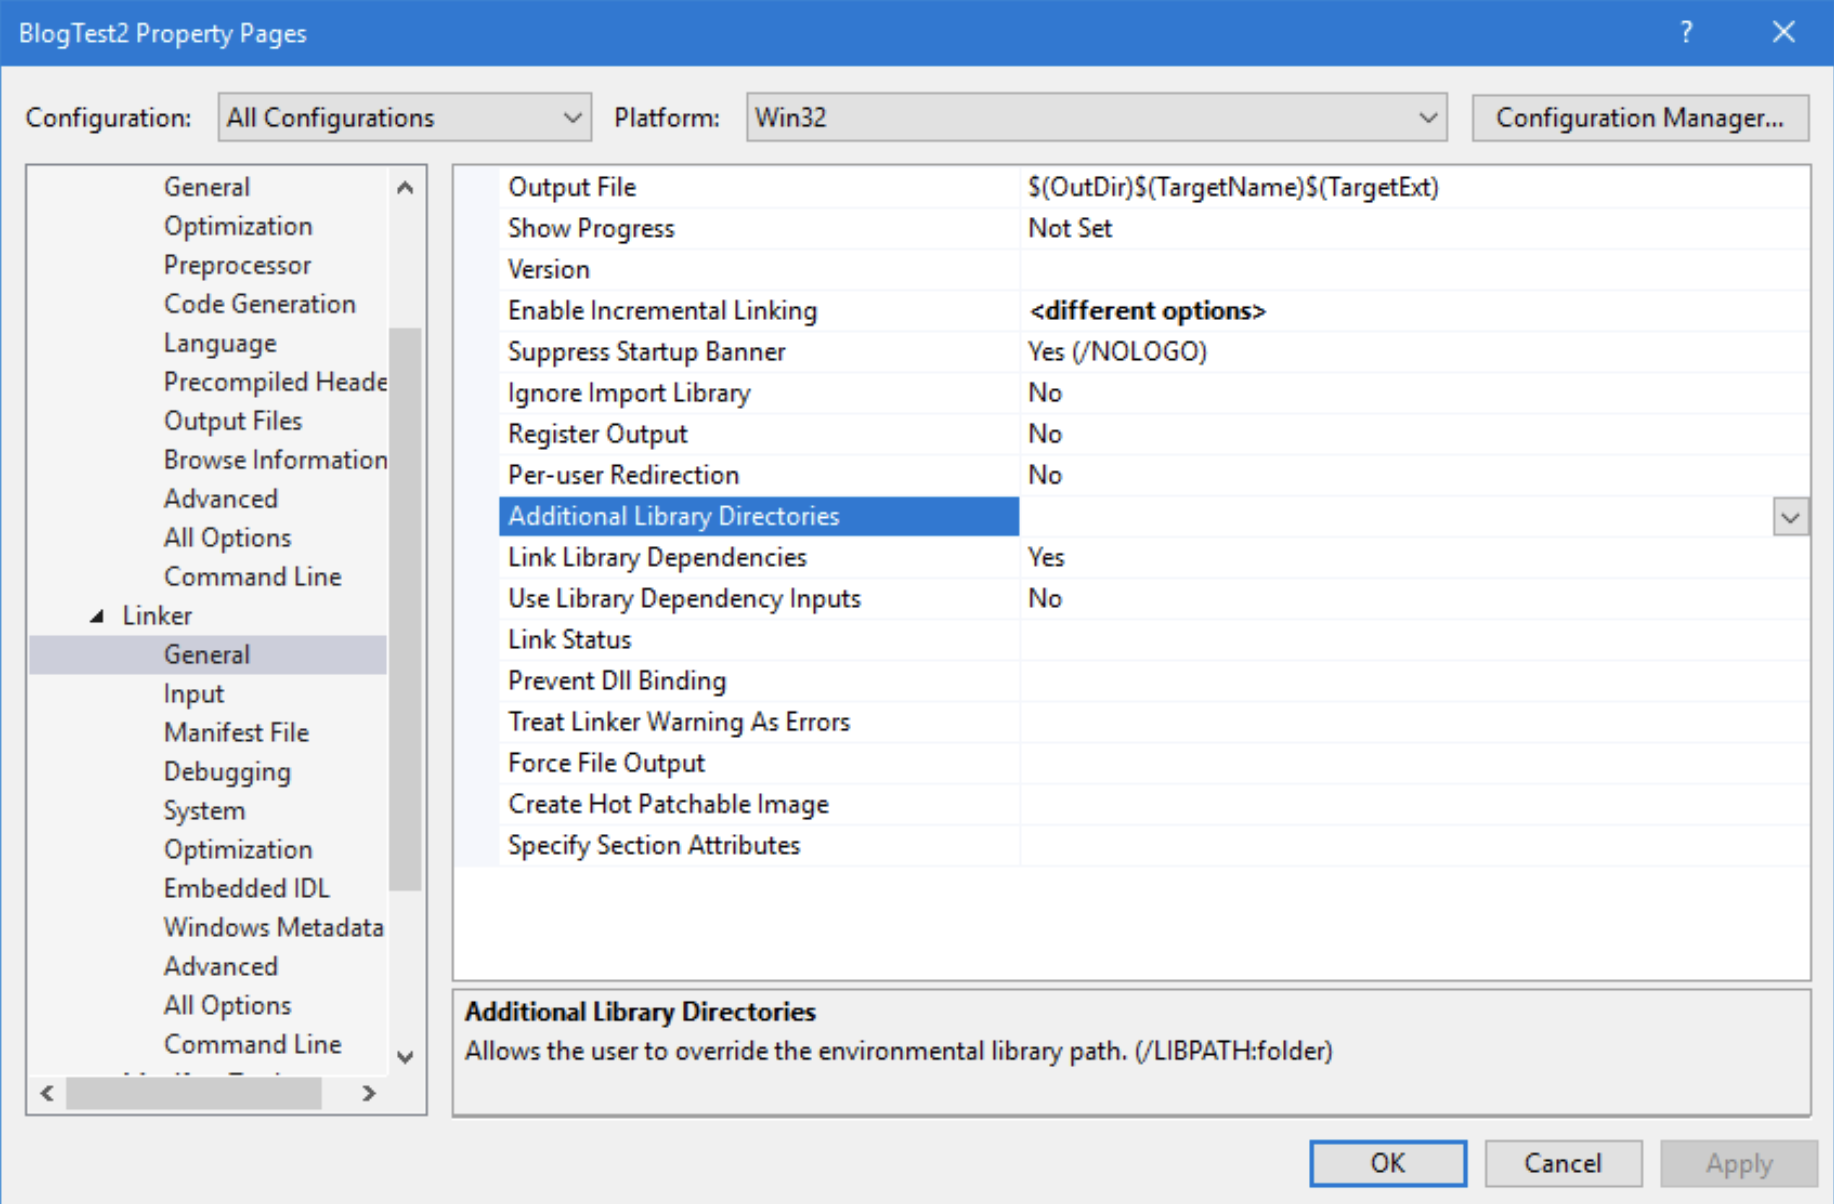
Project > Properties > Configuration properties > Linker > General-> Additional Library Directories
- Select Configuration: ”All Configurations”
- Select Platform: “Win32”
Edit “Additional Library Directories”
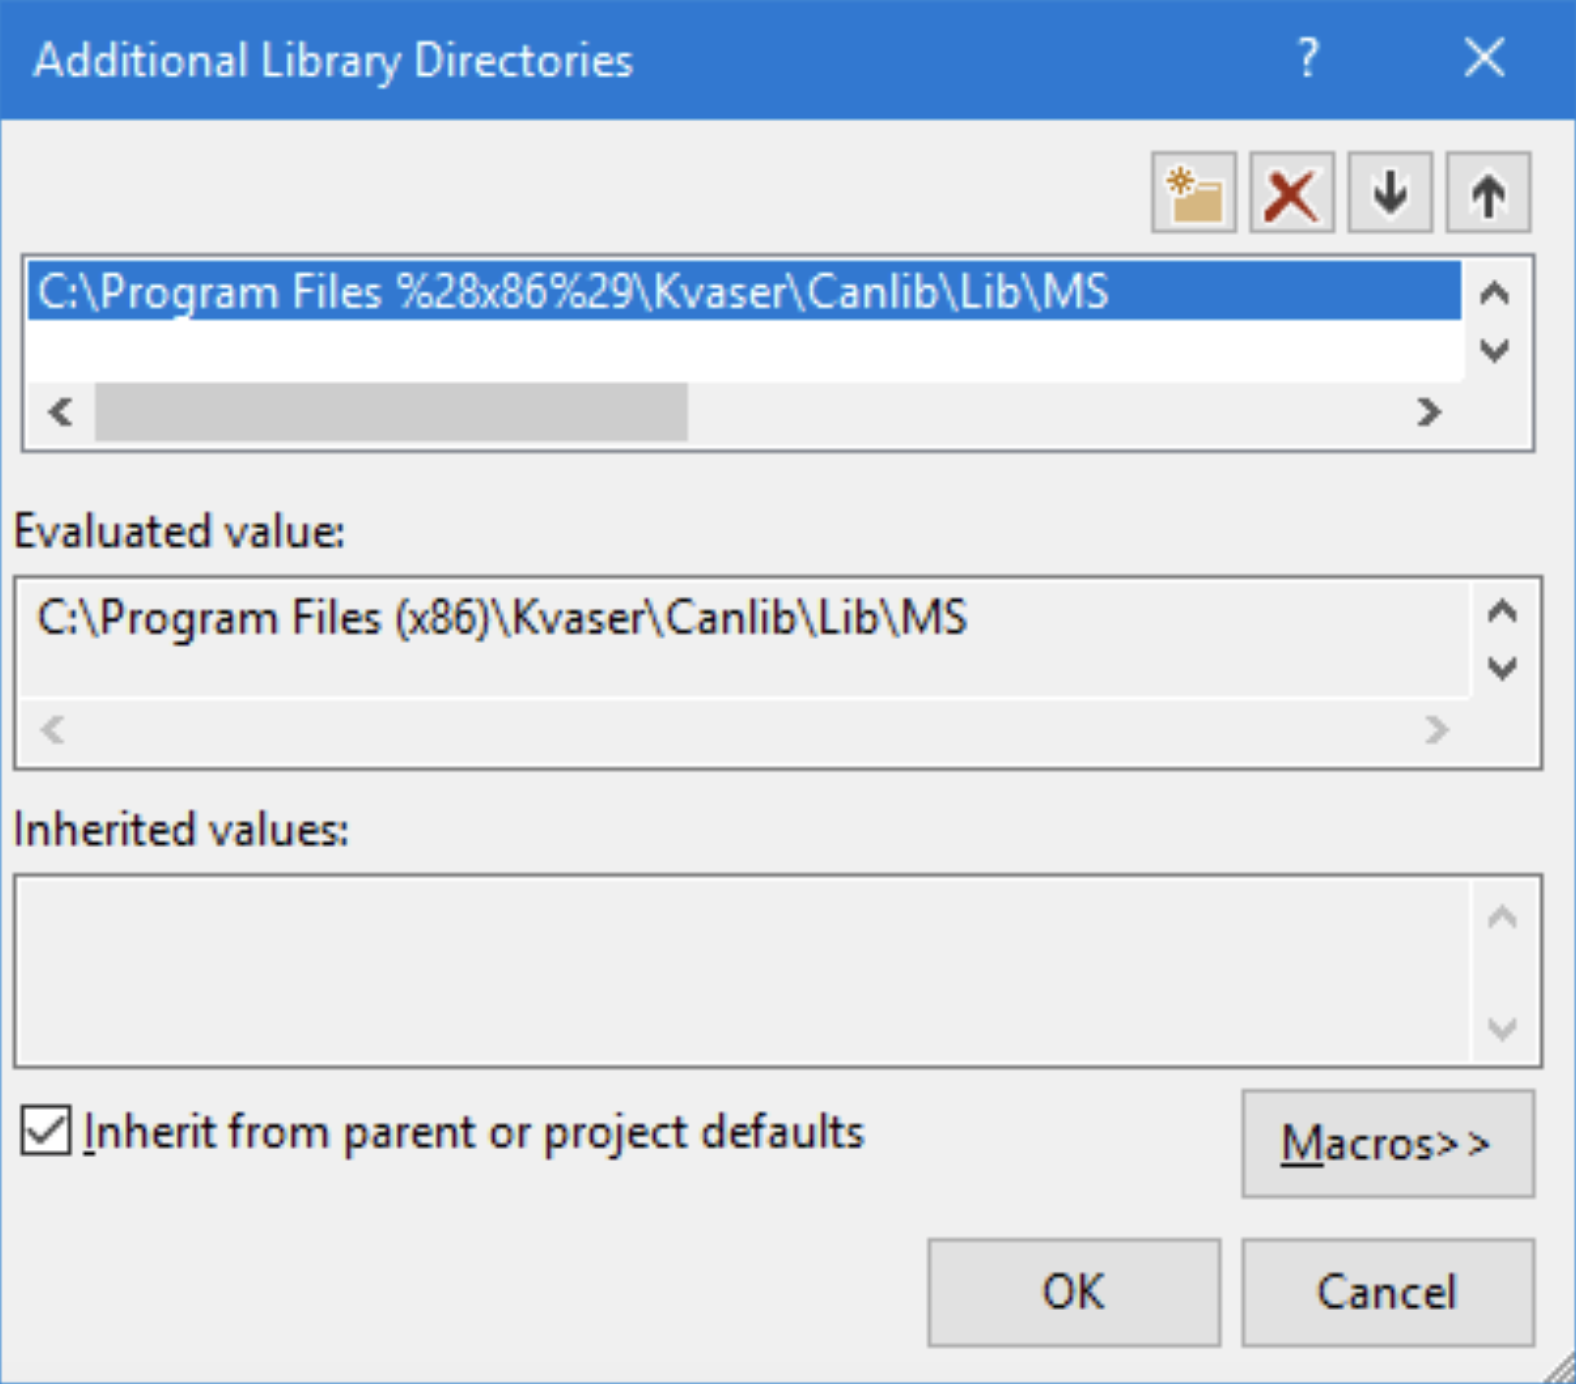
Add “C:\Program Files (x86)\Kvaser\Canlib\Lib\MS”
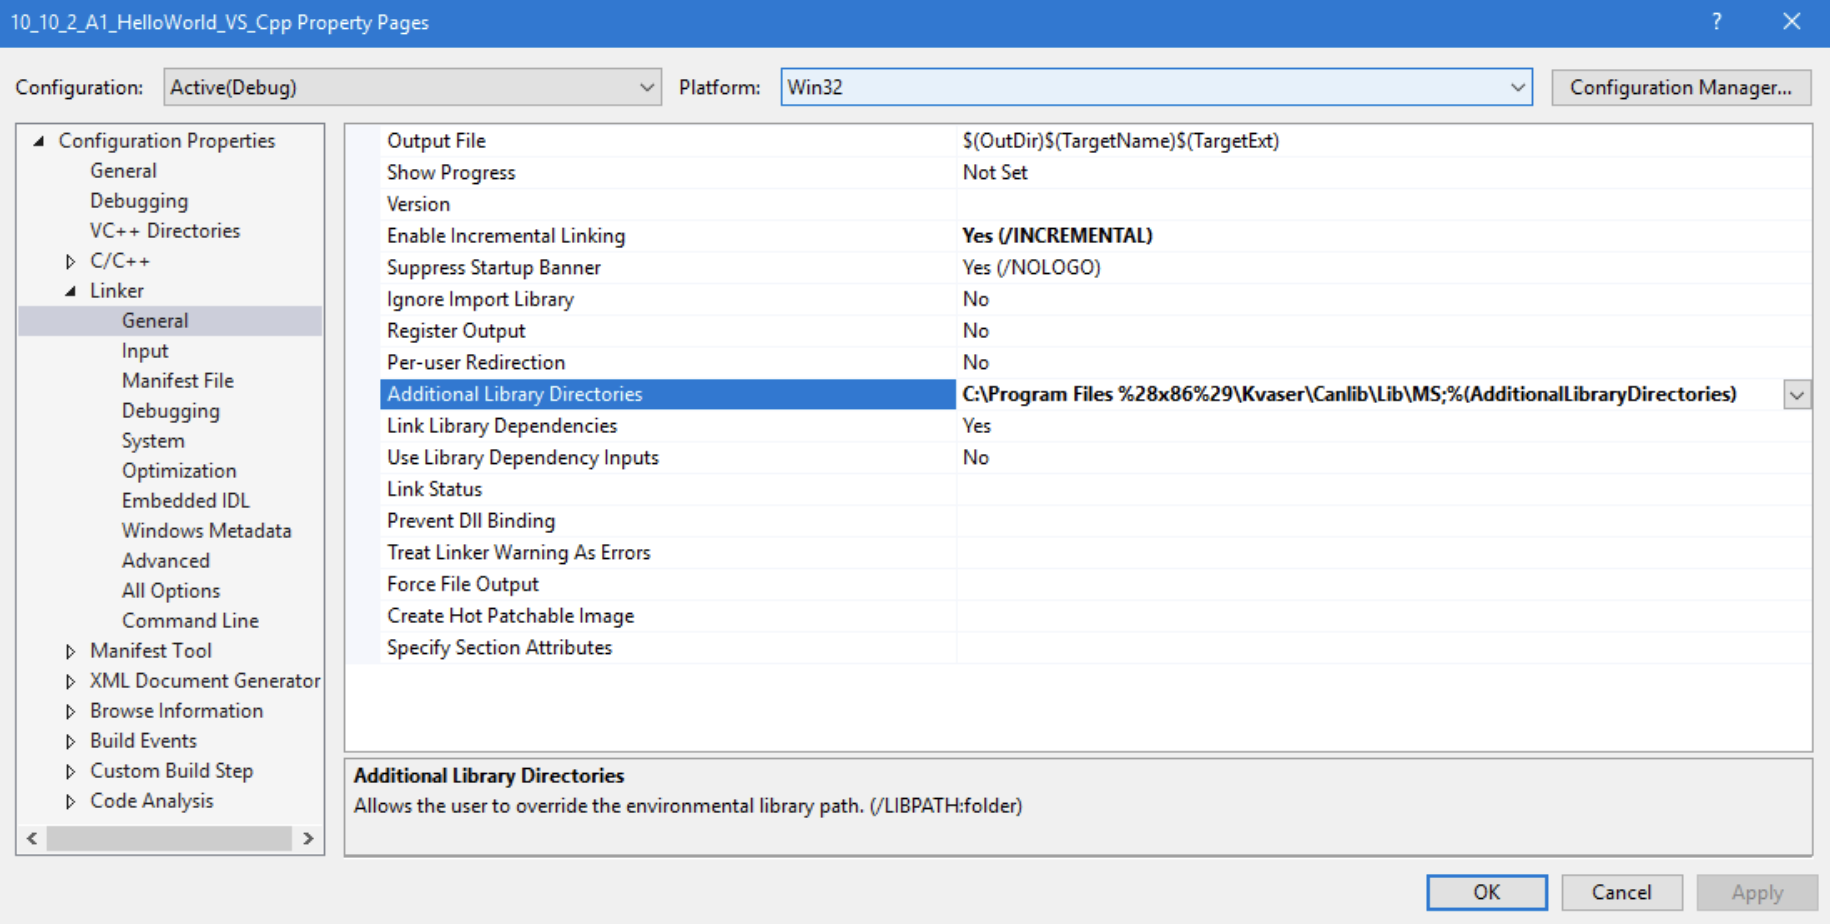
Result:
Add path to LIB (x64)
Open menu:
Project > Properties > Configuration properties > Linker > General-> Additional Library Directories
- Select Configuration: ”All Configurations”
- Select Platform: “Win64”
Edit “Additional Library Directories”
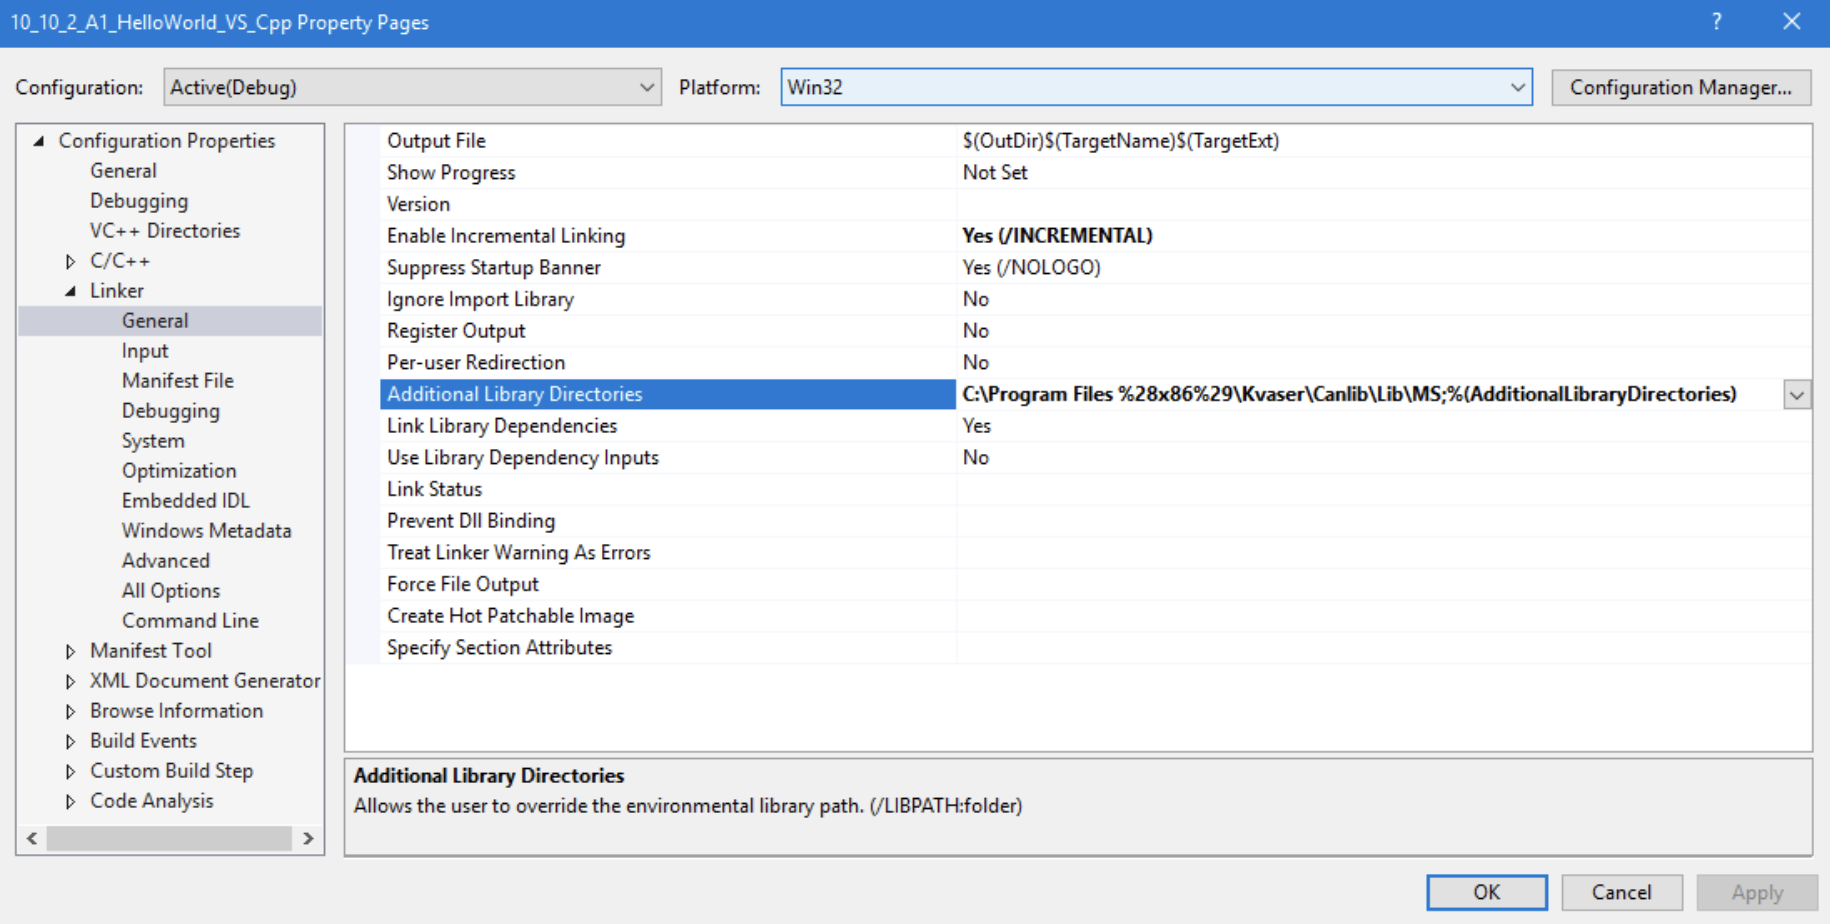
Add “C:\Program Files (x86)\Kvaser\Canlib\Lib\x64”
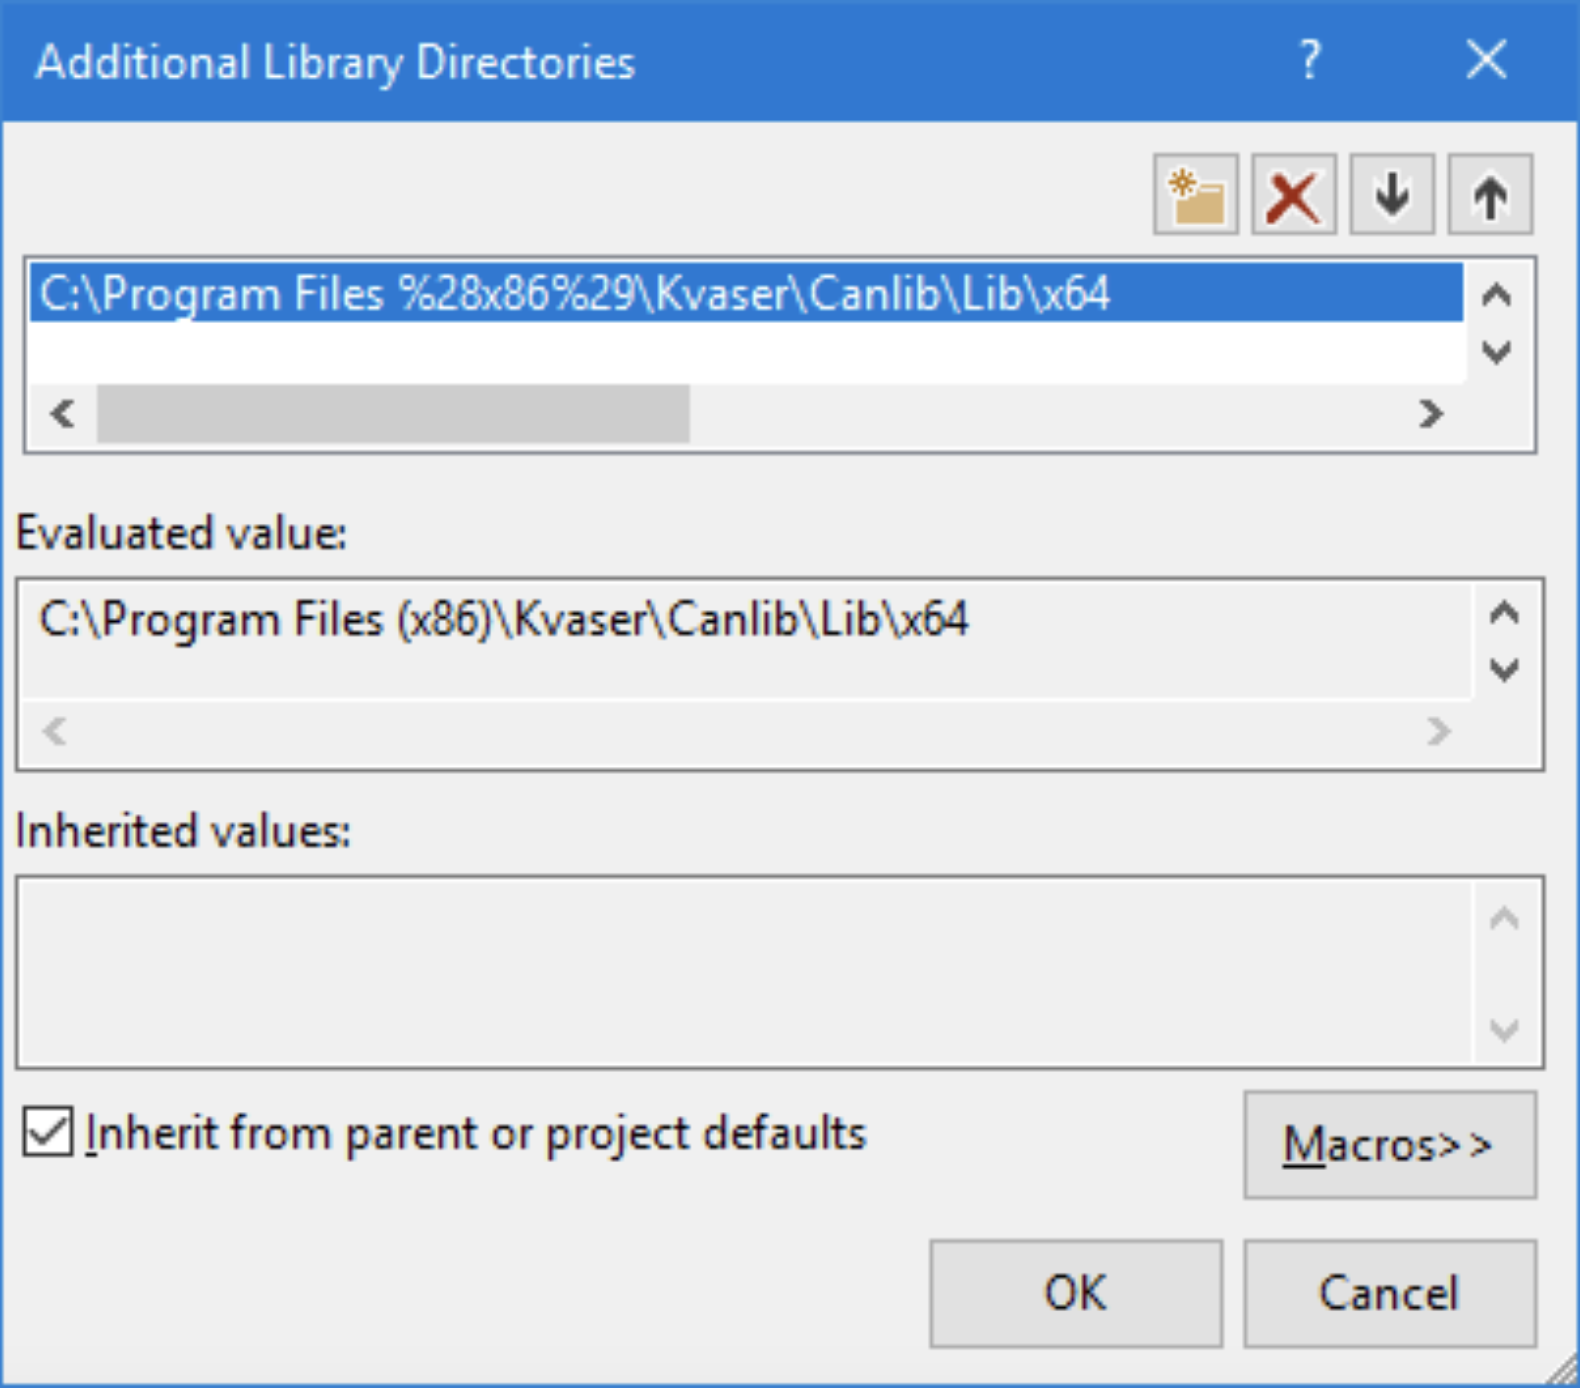
Result:
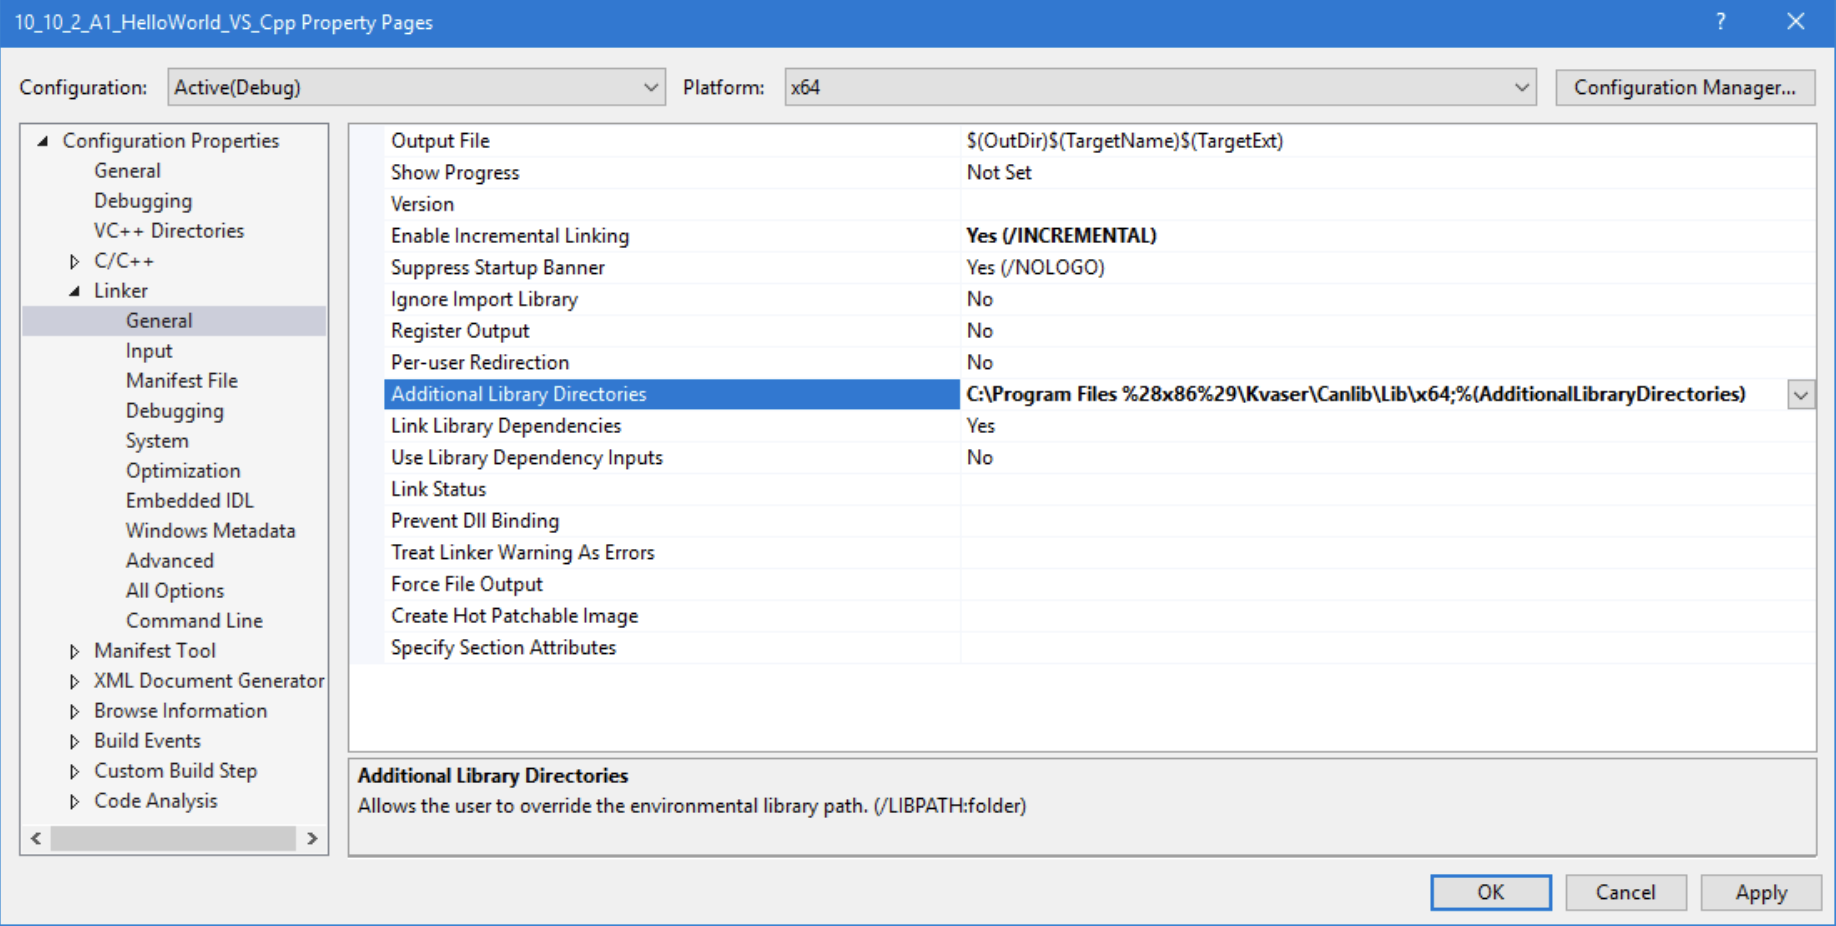
Add #include <canlib.h>
Add the include directive: “#include “canlib.h” to your source code.
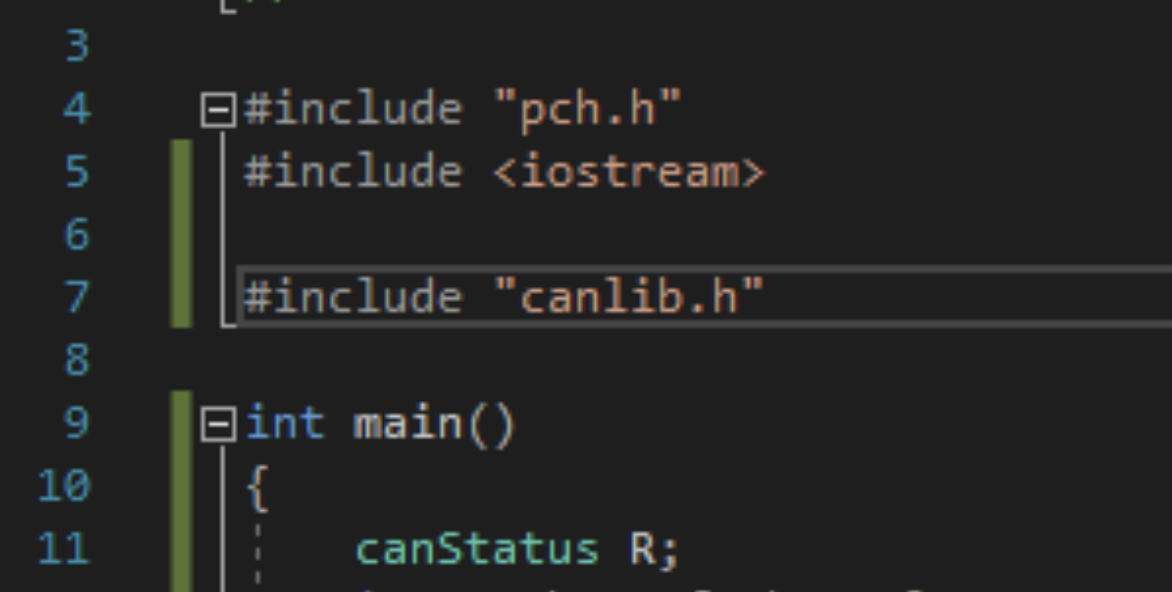
Selecting platform x86 and x64
I can now select x86 (win32) and x64 (win64) as active platforms. In both cases, the application starts correctly and CANlib is available and working.
If everything worked well, you should also be able to create a C++ CANlib application in Visual Studio 2017.
We have now enabled CANlib in Visual Studio 2017, created a C++ project and tested it for both x86 and x64.
ΟΕΔ (Q.E.D. Quod erat demonstrandum)
Distribution of code
Please remember, when using your application on a “client machine”, install “Kvaser Drivers” and “Microsoft Visual C++ Redistributable for Visual Studio 2017”.
Thanks for reading this! If you have any questions or comment regarding this paper, please send a mail to SUPPORT@KVASER.COM.
