Kvaser Device Guide is the successor of/to Kvaser Hardware, the tool for getting information about the Kvaser Devices connected to your Windows PC.1 Kvaser Device Guide reimplements the old Kvaser Hardware functionality in an updated
graphical interface and gives new easy access to device configuration.
Developer Blog
Kvaser Device Guide
Device Guide - What is it?
What is new?
The GUI update was done in order to get a better overview of devices and channels. You can now also enable/disable individual views to customize some of the information shown.
The main functional improvement is the added ability to start configuring a connected Kvaser Device directly using the context menu. For example, right click on your Kvaser Memorator, select “Configure Memorator” and the appropriate configuration tool2 will be started.
An Overview
Starting Kvaser Device Guide opens up the main window as shown in Figure 1.
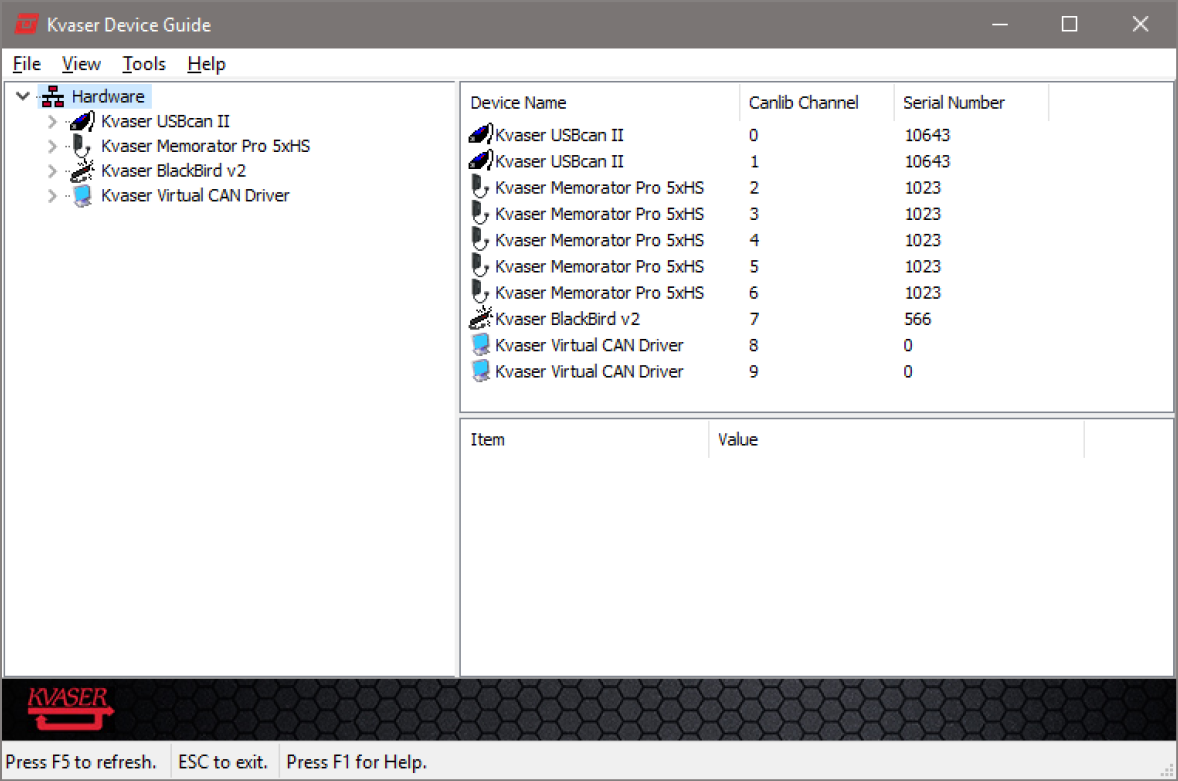
Figure 1: The main window of Kvaser Device Guide showing connected devices.
Hardware Tree
The left pane of the Kvaser Design Guide, contains the Hardware Tree View where all connected devices are listed. Using the View menu, the Hardware Tree can be expanded to show all channels as well as include the Synchronized Hardware3 as shown in Figure 2.
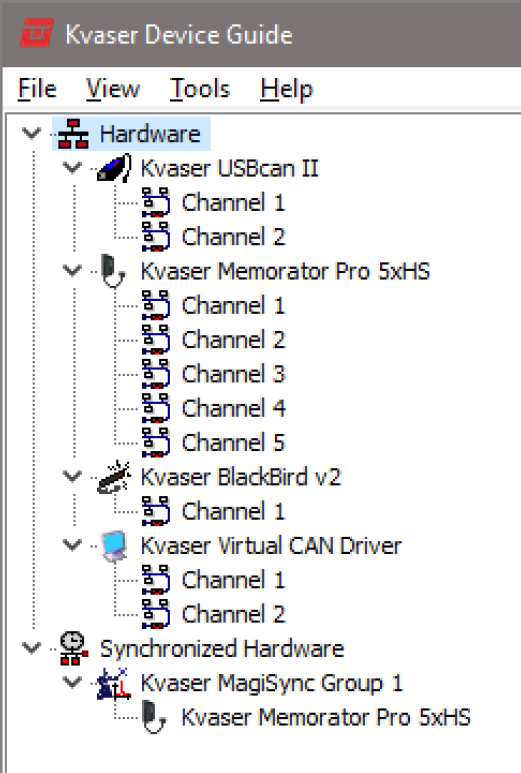
Figure 2: The Hardware Tree View fully expanded, including Synchronized Hardware.
Tools Menu
The Tools menu contains a list of Kvaser programs that can be explicitly started, see Figure 4. The first entries in the Tools menu contains Programs that optionally can be installed on the computer: 4
Kvaser Memorator Tools Used to con gure older generations of Kvaser Memorators.
Kvaser Config Tool Used to configure current generation of Kvaser Memorators. The latest version of this tool is needed in order to support Kvaser Device Guide’s context menus.
If you try and start e.g. Kvaser Memorator Tools and that program was not installed, you’ll get a noti cation as shown in Figure 3. Programs that can be started from the Tools menu and are bundled in the same download as Kvaser Device Guide include:
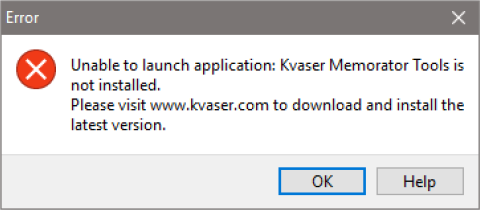
Figure 3: You will get noti ed if you try to start a tool that isn’t installed.
Kvaser Remote Device Configuration Used to con gure remote devices. This program configures e.g. SSID and WiFi password on a wireless device such as Kvaser Blackbird v2.
Kvaser Network Device Selector Used to find and connect remote devices to your PC. A remote device needs to be connected before any application running on the PC can access the remote device.5
Kvaser Customer Data Small utility tool to set customer data in supported devices.
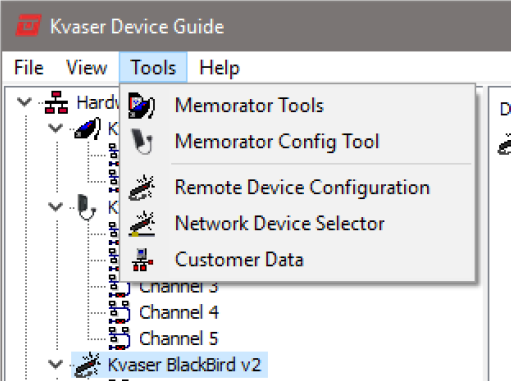
Figure 4: Other Kvaser programs can be started from the Tools menu.
Context Menu
Right-clicking on a device in the Hardware Tree brings up the context menu as shown in Figure 5. The appropriate configuration tool can be launched from the context menu, provided that the relevant program is installed.
When a configuration tool is launched via the context menu, the tool will automatically connect to the selected device. This behavior can be changed in the Settings dialog, see Figure 6.
Throughout the Kvaser Device Guide, online help is available by using the Windows “F1” help button, see Figure 7.
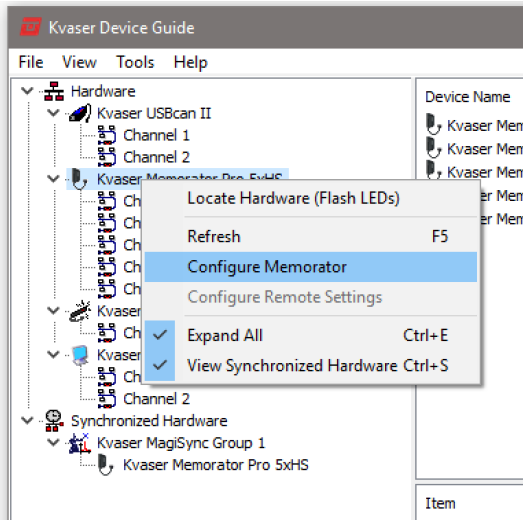
Figure 5: The context menu of Kvaser Memorator Pro will launch Kvaser Memorator Config Tool when “Configure Memorator” is selected.
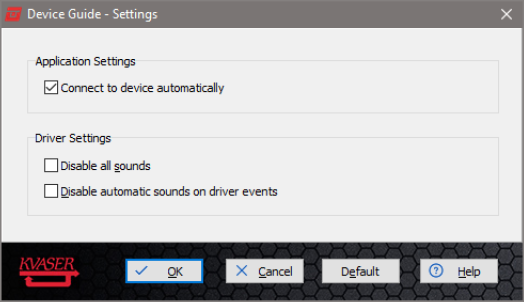
Figure 6: The Settings dialog with option for the the context menu to automatically connect to selected device.
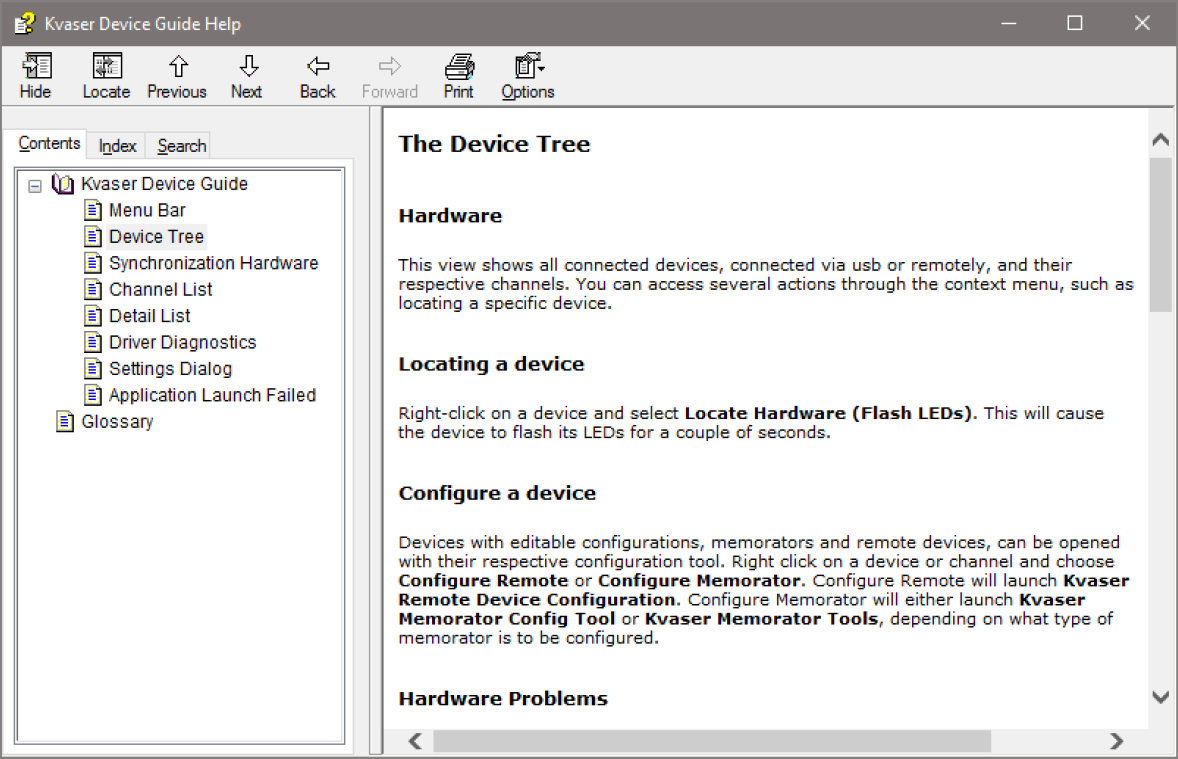
Figure 7: The Windows online help is available through the context sensitive ‘F1’ hot key.
Channel Information
Selecting a device in the Tree View lists the corresponding channels in the top right pane of the Kvaser Device Guide. Below this list of channels, more information about the currently selected channel is shown, see Figure 8. The fields Bus Parameter and Detailed information can be hidden using the View menu.
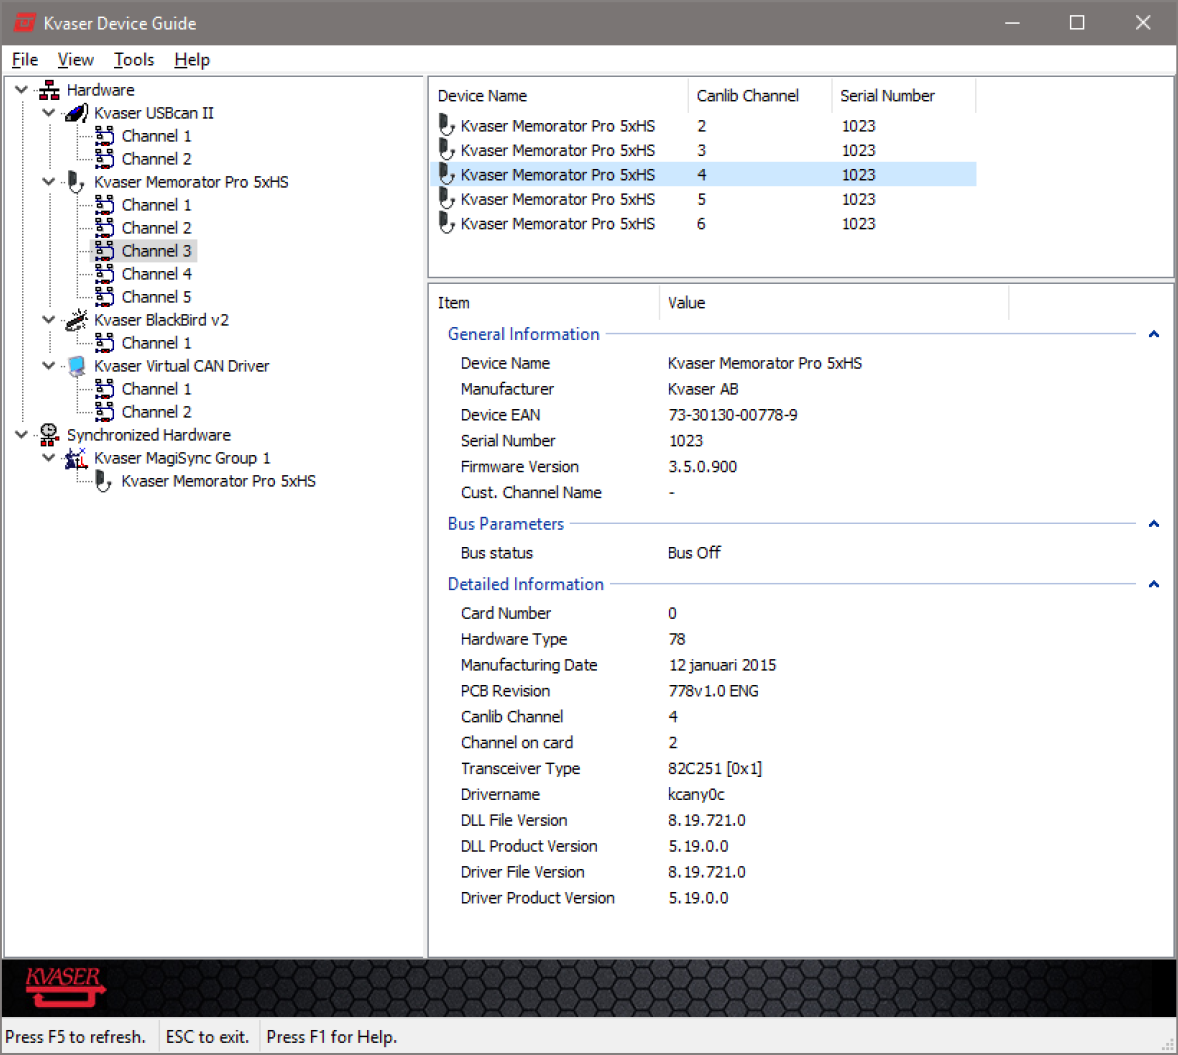
Figure 8: Channel Information with all available information shown.
If you are having issues with one of your Kvaser devices, select a channel of the device in question and make sure that the Detailed Information is visible. Right click on Detailed Information and choose Select All from the context menu. Then right click on the Detailed Information again and choose Copy from the context menu. Paste this information into an e-mail to support@kvaser.com where you also describe your problem. This provides the support staff with a good starting point for diagnosing your issue.
Feedback
Bug reports, contributions, and suggestions for improvements are much appreciated and can be sent by e-mail to support@kvaser.com.
Footnotes
1 The old Kvaser Hardware executable is also included in the Kvaser Drivers installation (defaults to C:\Program Files\Kvaser\Drivers\32\kvaserhardware.exe).
2 Kvaser Memorator Config Tool is appropriate for newer devices, older Memorator devices will use the Kvaser Memorator Tools.
3 Synchronized Hardware shows the devices that have MagiSync.
4 These optional programs can be downloaded from www.kvaser.com/download.
5 Once a remote device is “connected” to the PC, the device is available for use in CANlib, just as if the device had been locally attached using USB.
