Developer Blog

15/11/2024 by Adam Raymer

How to split log files using the trigger function of a Memorator Pro, to facilitate data extraction

If you have a situation where you need to log large amounts of data, it can be cumbersome to extract it all at once. Depending on the amount of data, it may take a long time for a PC to process all the records. Is there a way for the Kvaser Memorator to split the logs by time, keeping the logs in order, and allowing you to extract the data in a certain recorded time frame? There is!

Usually, you would need to wait until the extraction process to split the log into separate files. Sometimes, it may be more convenient to stop logging and restart again, creating separate entries on the SD card. This article will discuss how to do that.

What we will be using are Triggers on the Memorator Pro. Basic Triggers can be used and accessed on the Kvaser Memorator 2xHS v2, Kvaser Memorator Pro 2xHS v2 and Kvaser Memorator Pro 5xHS. For this example, we will split logs for every two minutes of logging.

The first step is to open Kvaser Memorator Config Tools from the Windows Start Menu and choose the Memorator you are using. Connect to your Memorator. If required, sync the Memorator clock with the system and perform any disk maintenance (such as initializing or formatting).

To use Triggers, go to the left side of the Kvaser Memorator Config Tool, under Log Configuration. You will want to that ‘Log Everything – the triggers are disregarded but the filters are still used’ is unchecked. If this box is checked, any trigger you create will not be used. By default, this box is checked.
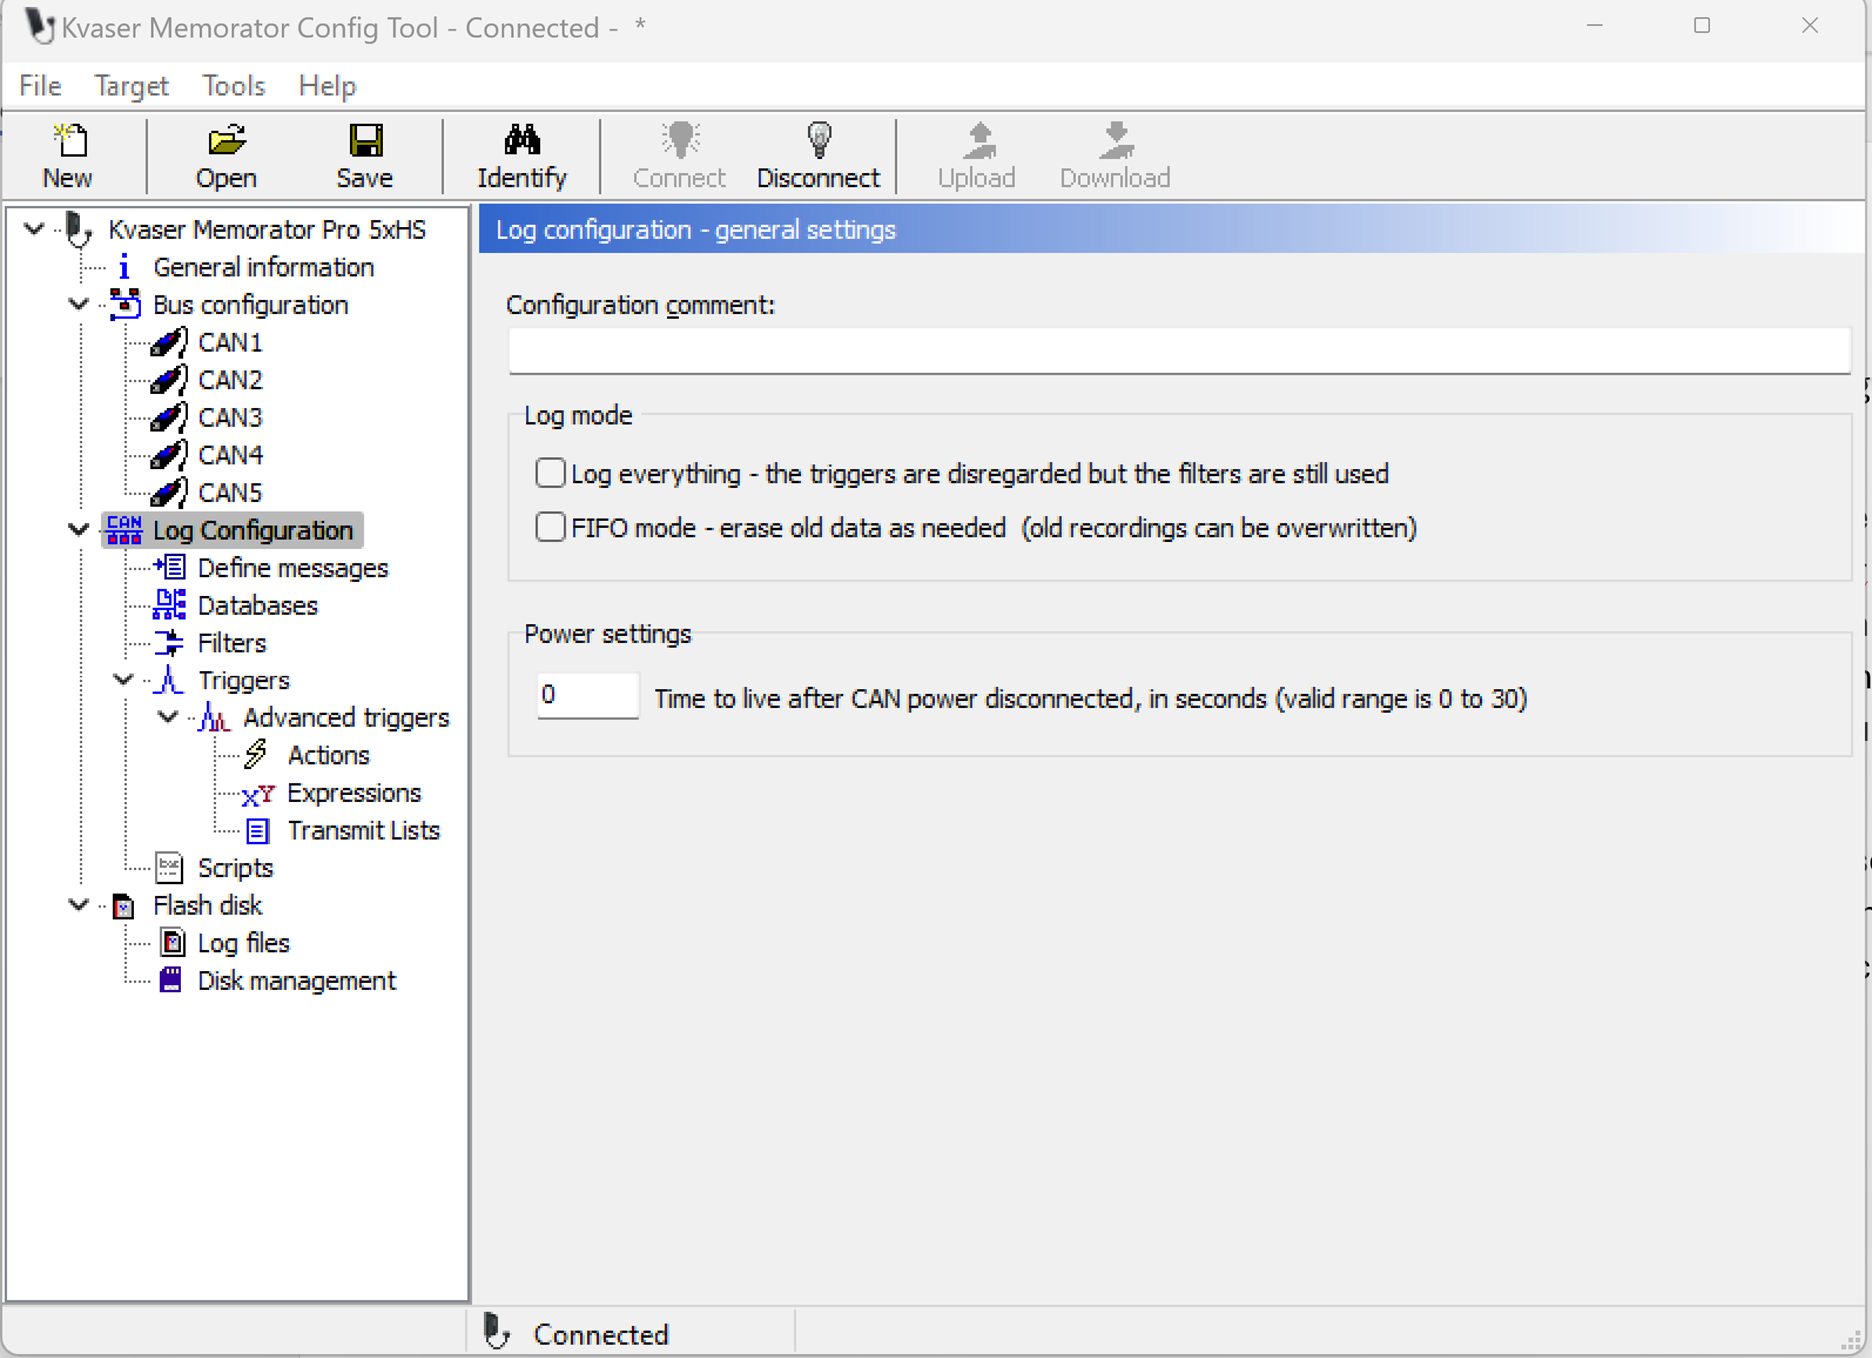
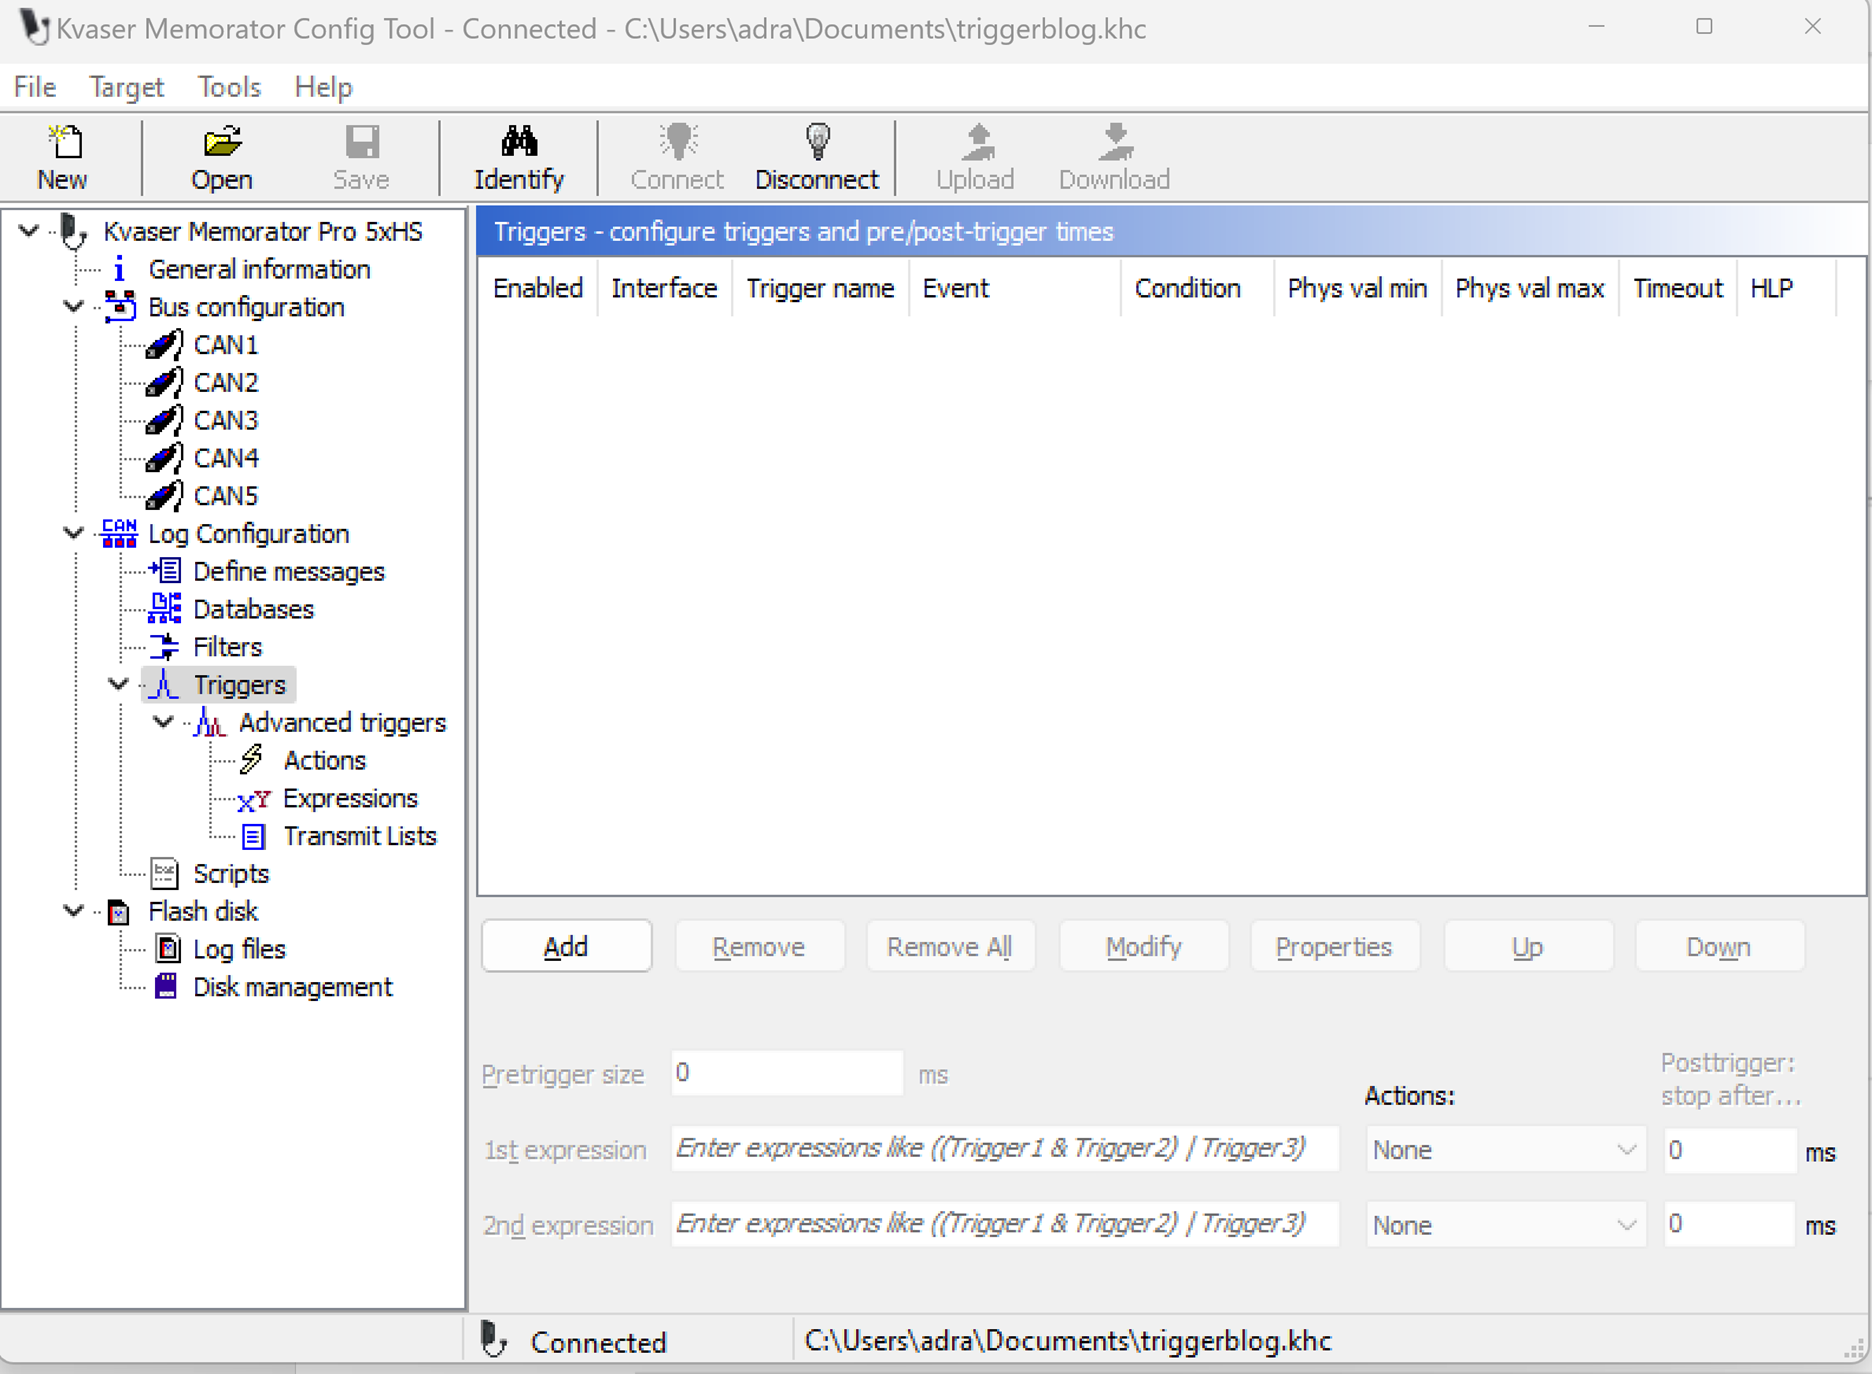
After making sure that ‘Log everything – the triggers are disregarded but the filters are still used’ is unchecked, go to Triggers. Here we will create two triggers: one to stop logging after two minutes and one to start logging again.

In the Triggers category, click Add to create a new trigger.

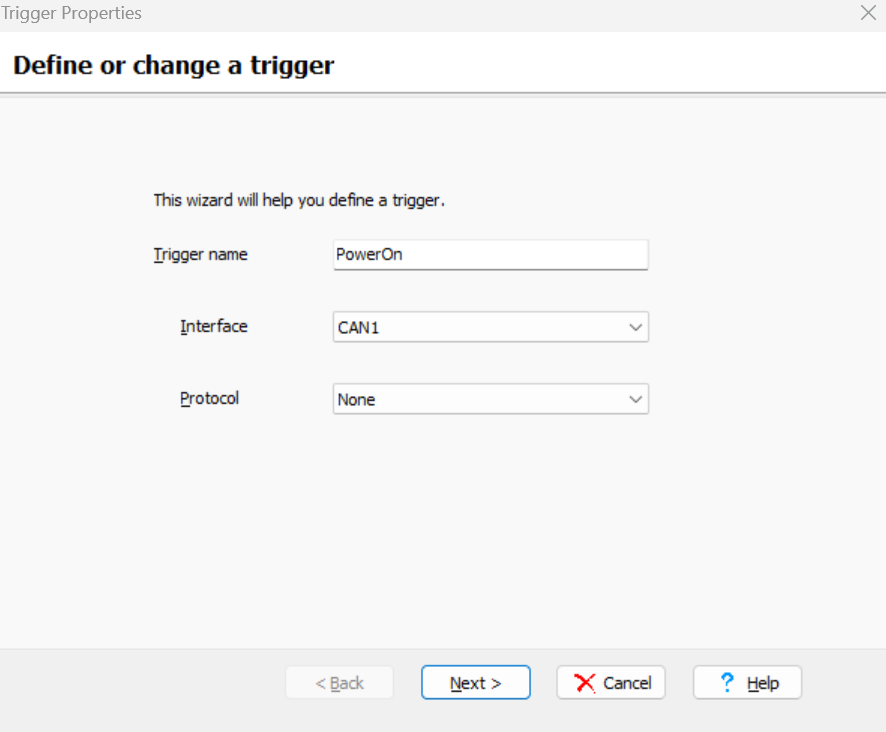
You can label your trigger with whatever term you like. In this case, ‘PowerOn’ is a good fit. You then choose on which channel you would like to default to.

Lastly, the protocol can be set to ‘None’ (for raw CAN data) or ‘J1939’ (for a J1939 format).

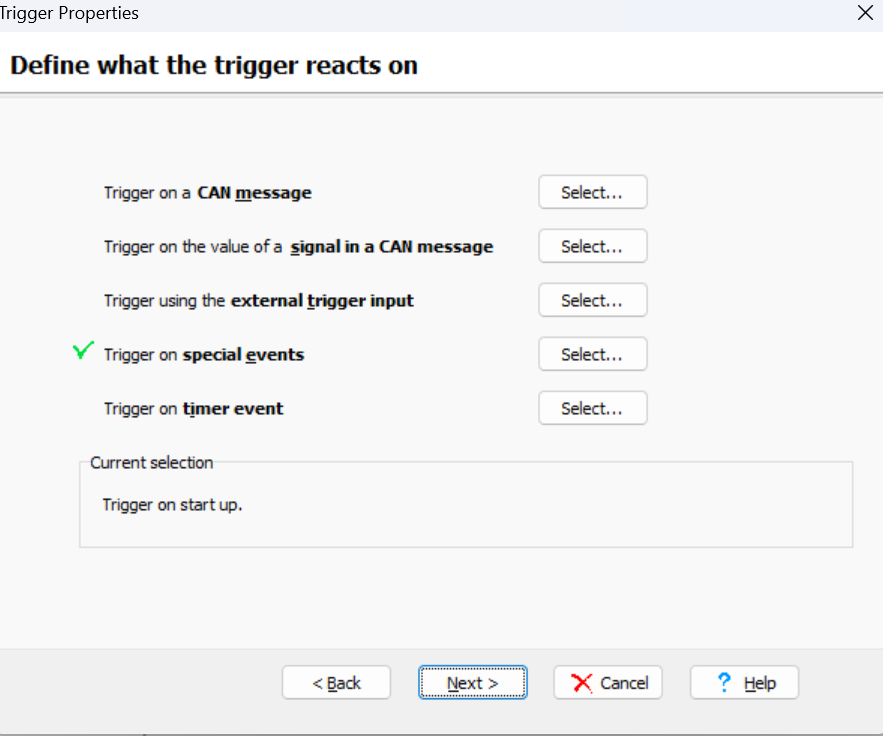
On the next screen, we need to select/define what the trigger reacts on.

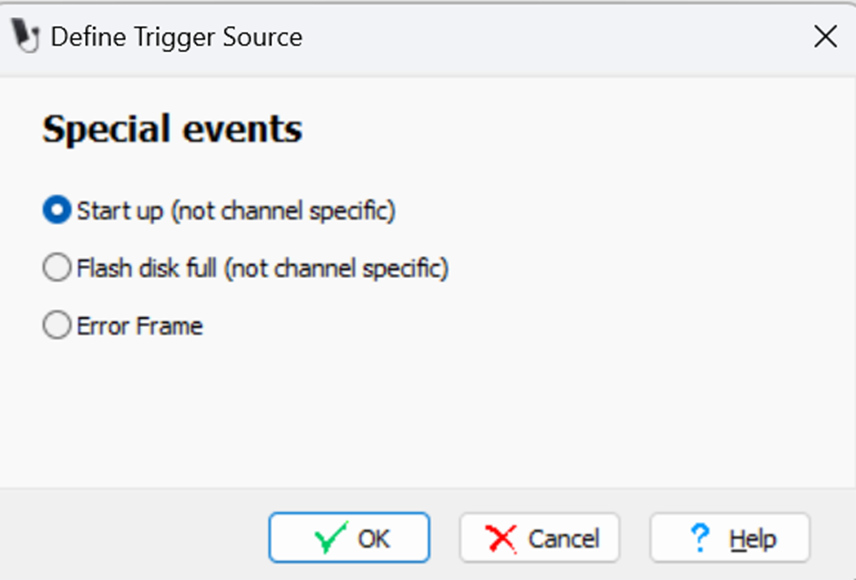
In the case of the PowerOn trigger, we want to trigger on a Special Event i.e. to start when the Memorator gets power.

For this use case Special Event, we would want the Kvaser Memorator Pro 5xHS to start up. After selecting Start Up, click OK and then click Next.

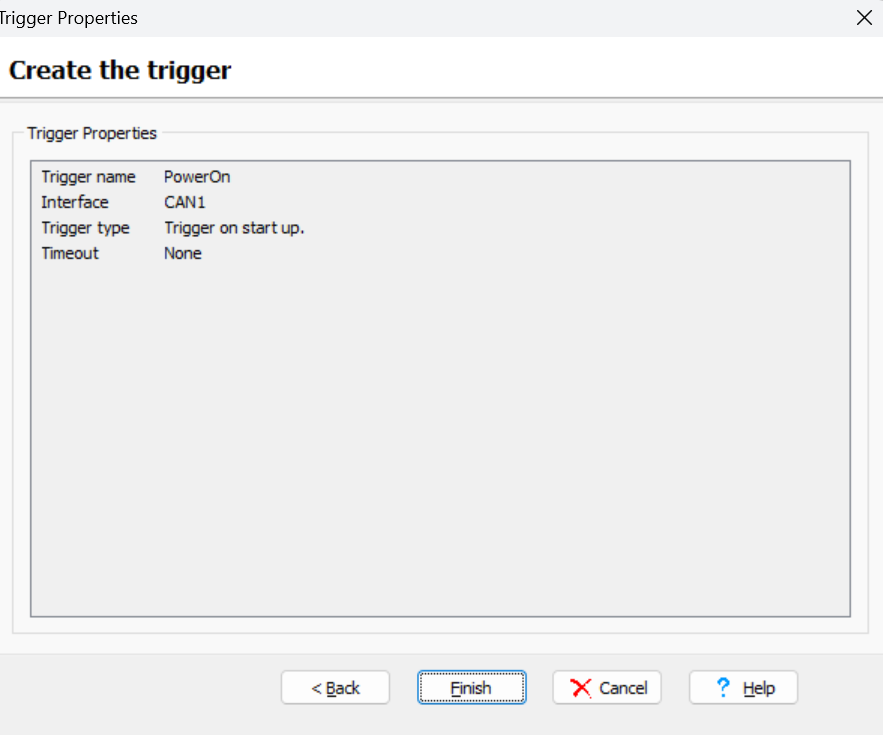
On the last screen, review the trigger and click Finish if satisfied. Now it is time to work on the second trigger.

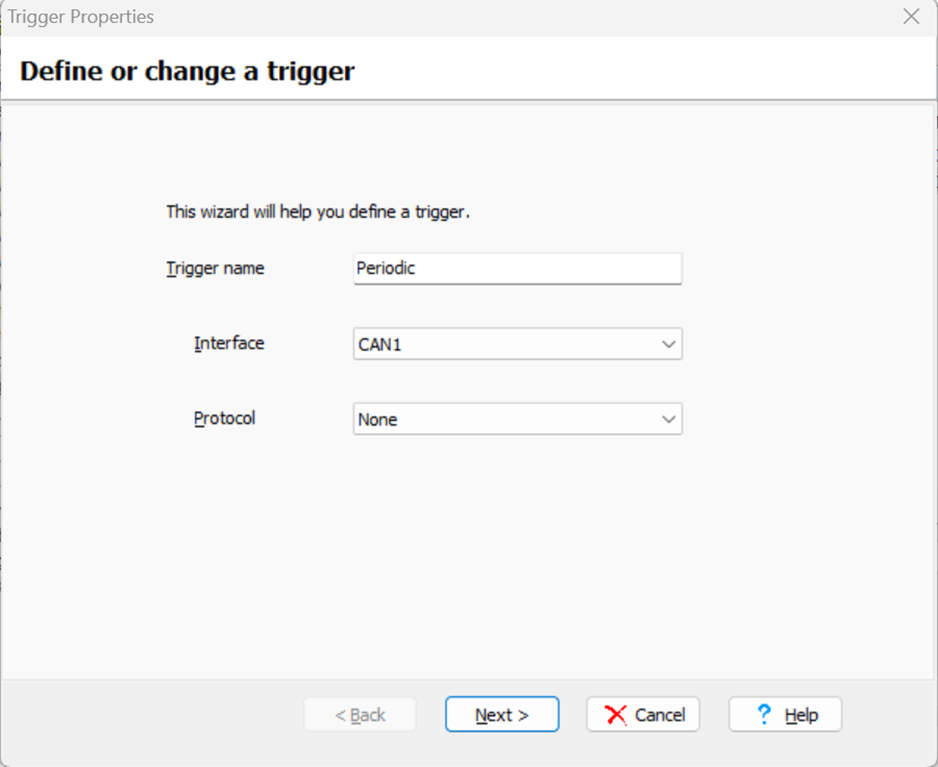
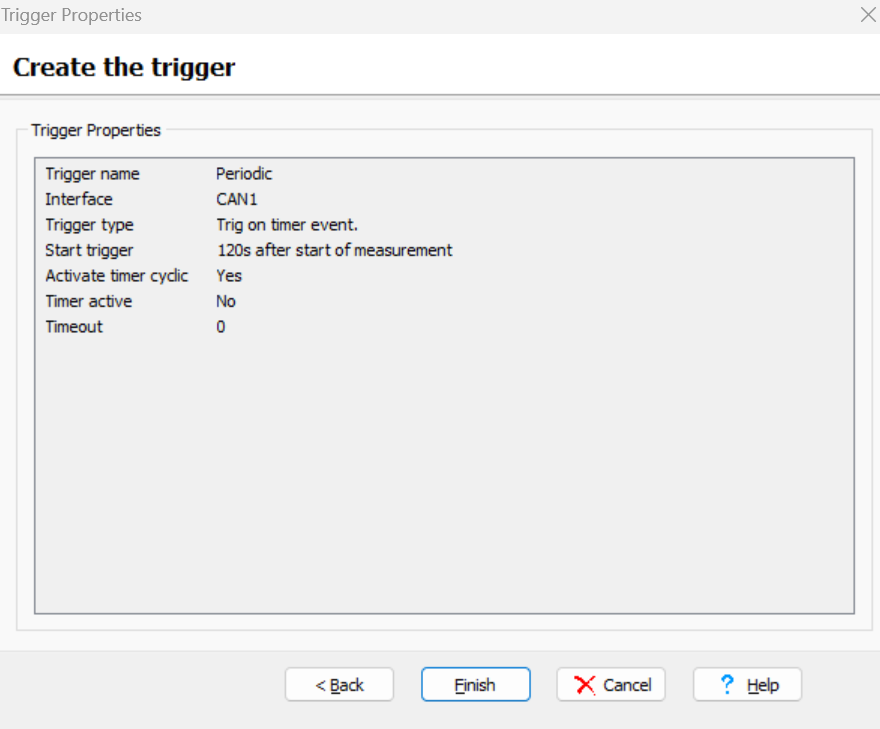
The process of creating the second trigger starts in the same way. Create a trigger name, what Channel it will read trigger information on, and the protocol. For this case, we can use the name Periodic beacuse it is creating a two-minute timer. When you are ready, click Next.

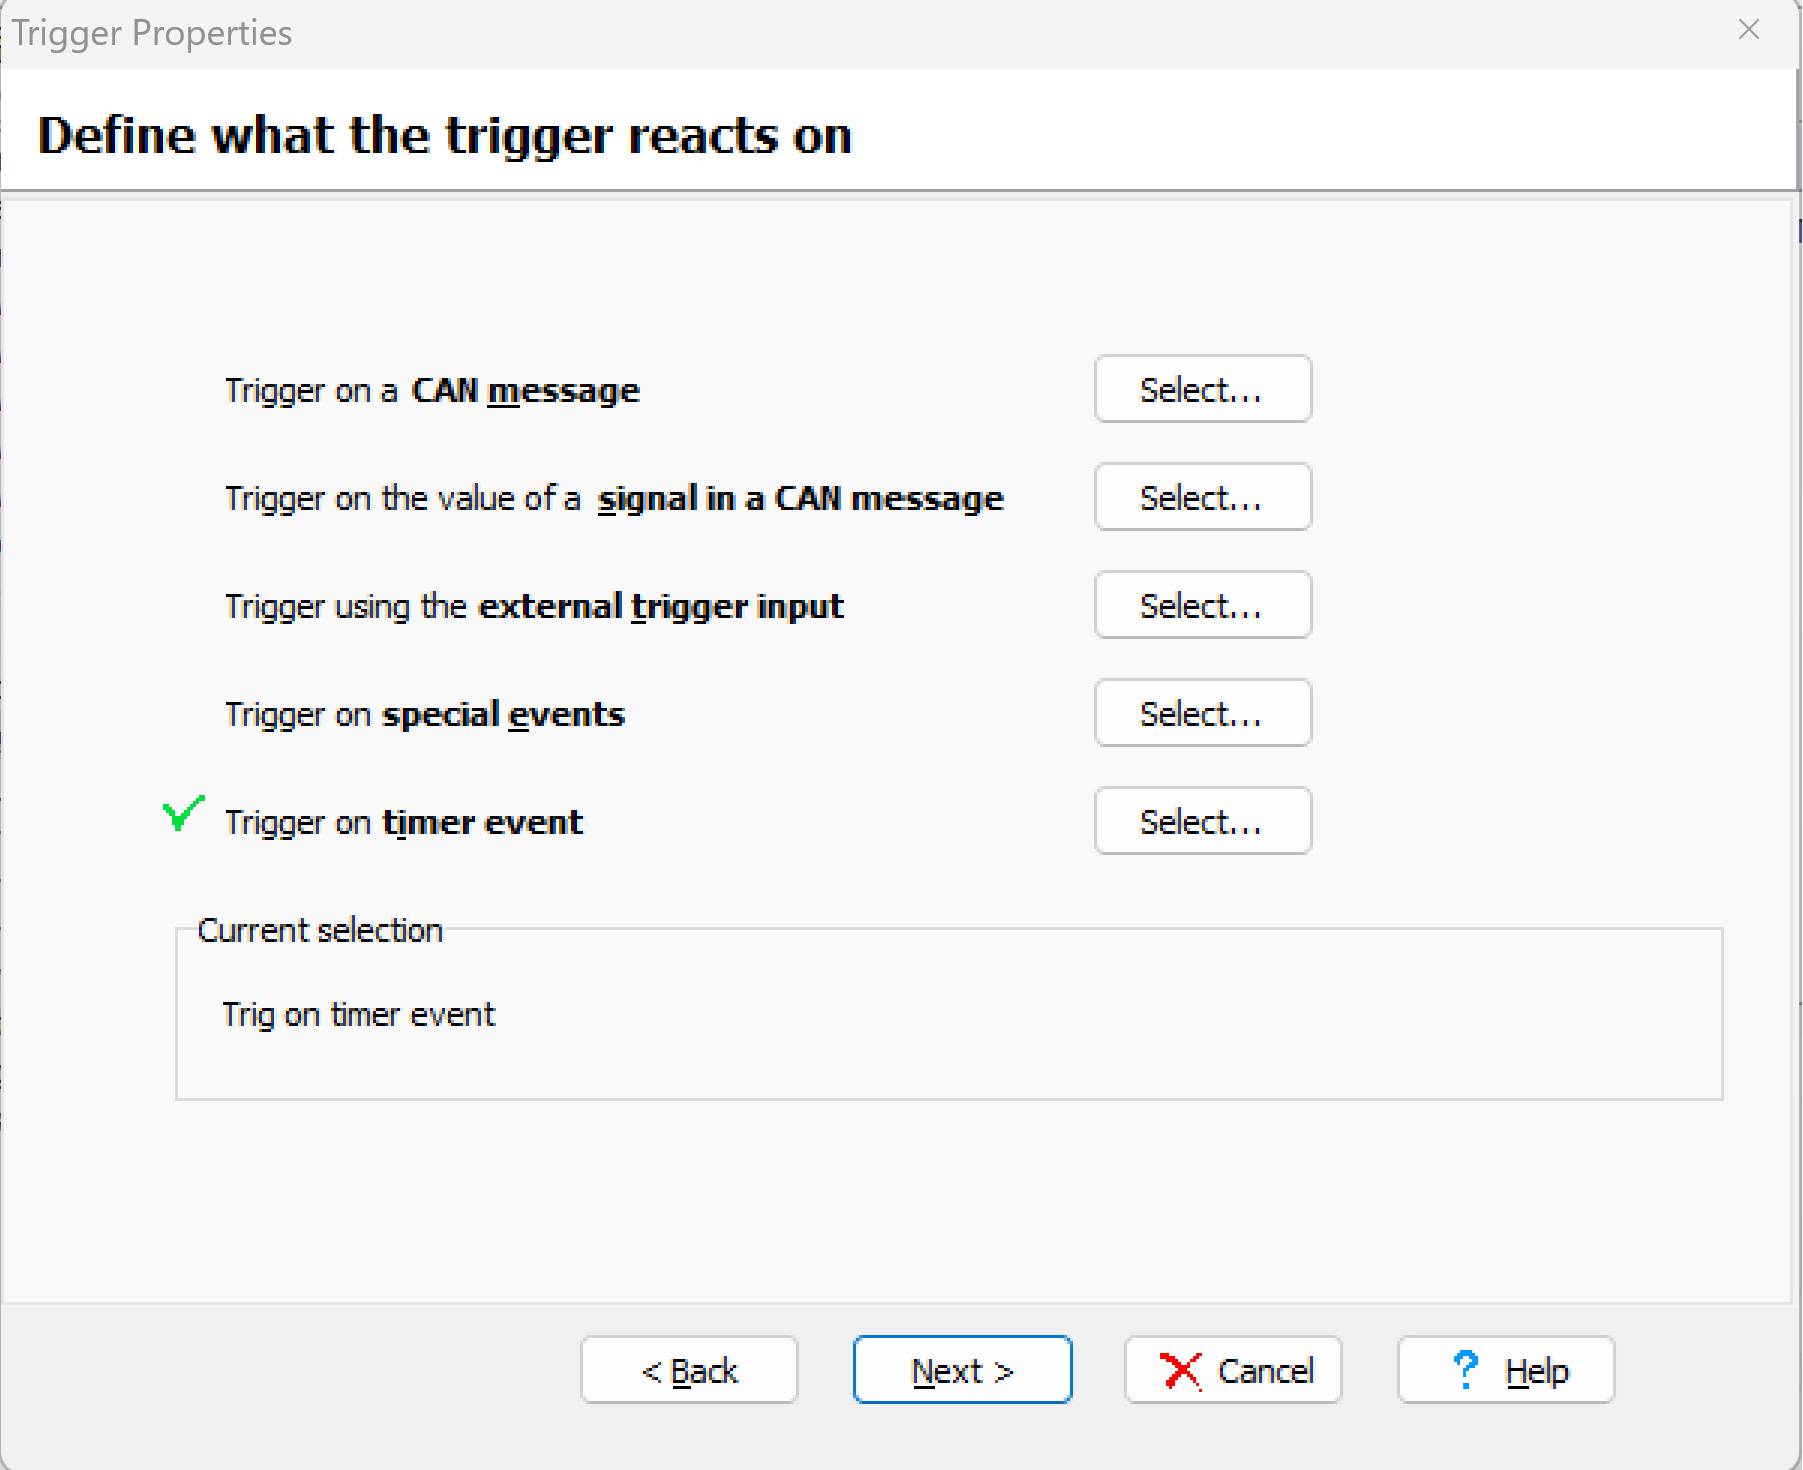
You will next want to create a Timer Event trigger.

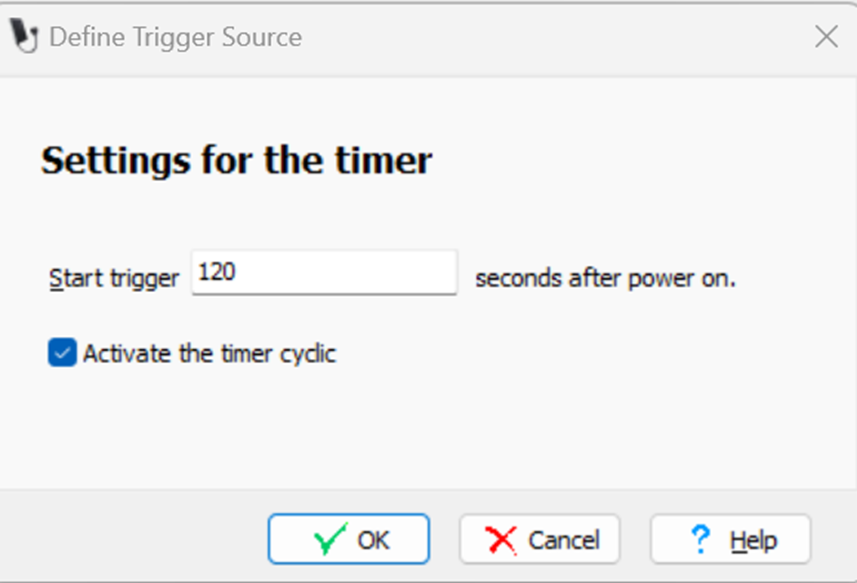
You want the Periodic trigger to count 120 seconds and restart when it is done. Set the number of seconds to 120 and check the ‘Activate the timer cyclic’ check box so that the timer will begin again.

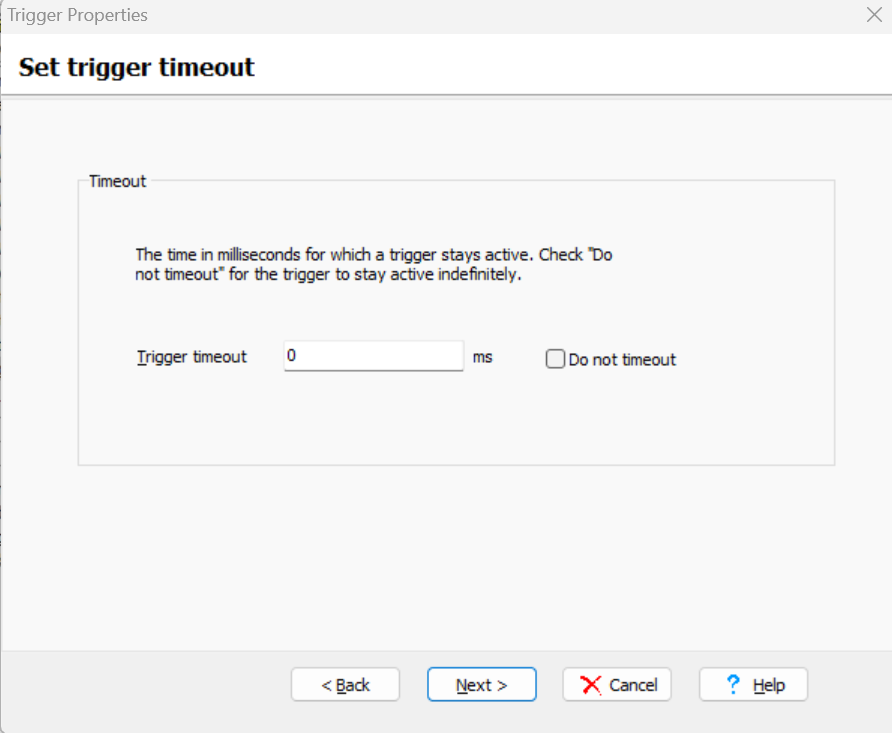
For the ‘Set trigger timeout’ screen, we want the trigger to run but not stay active. We want the timer to start once and when it is done, immediately stop so it can be triggered again. Click Next to continue.

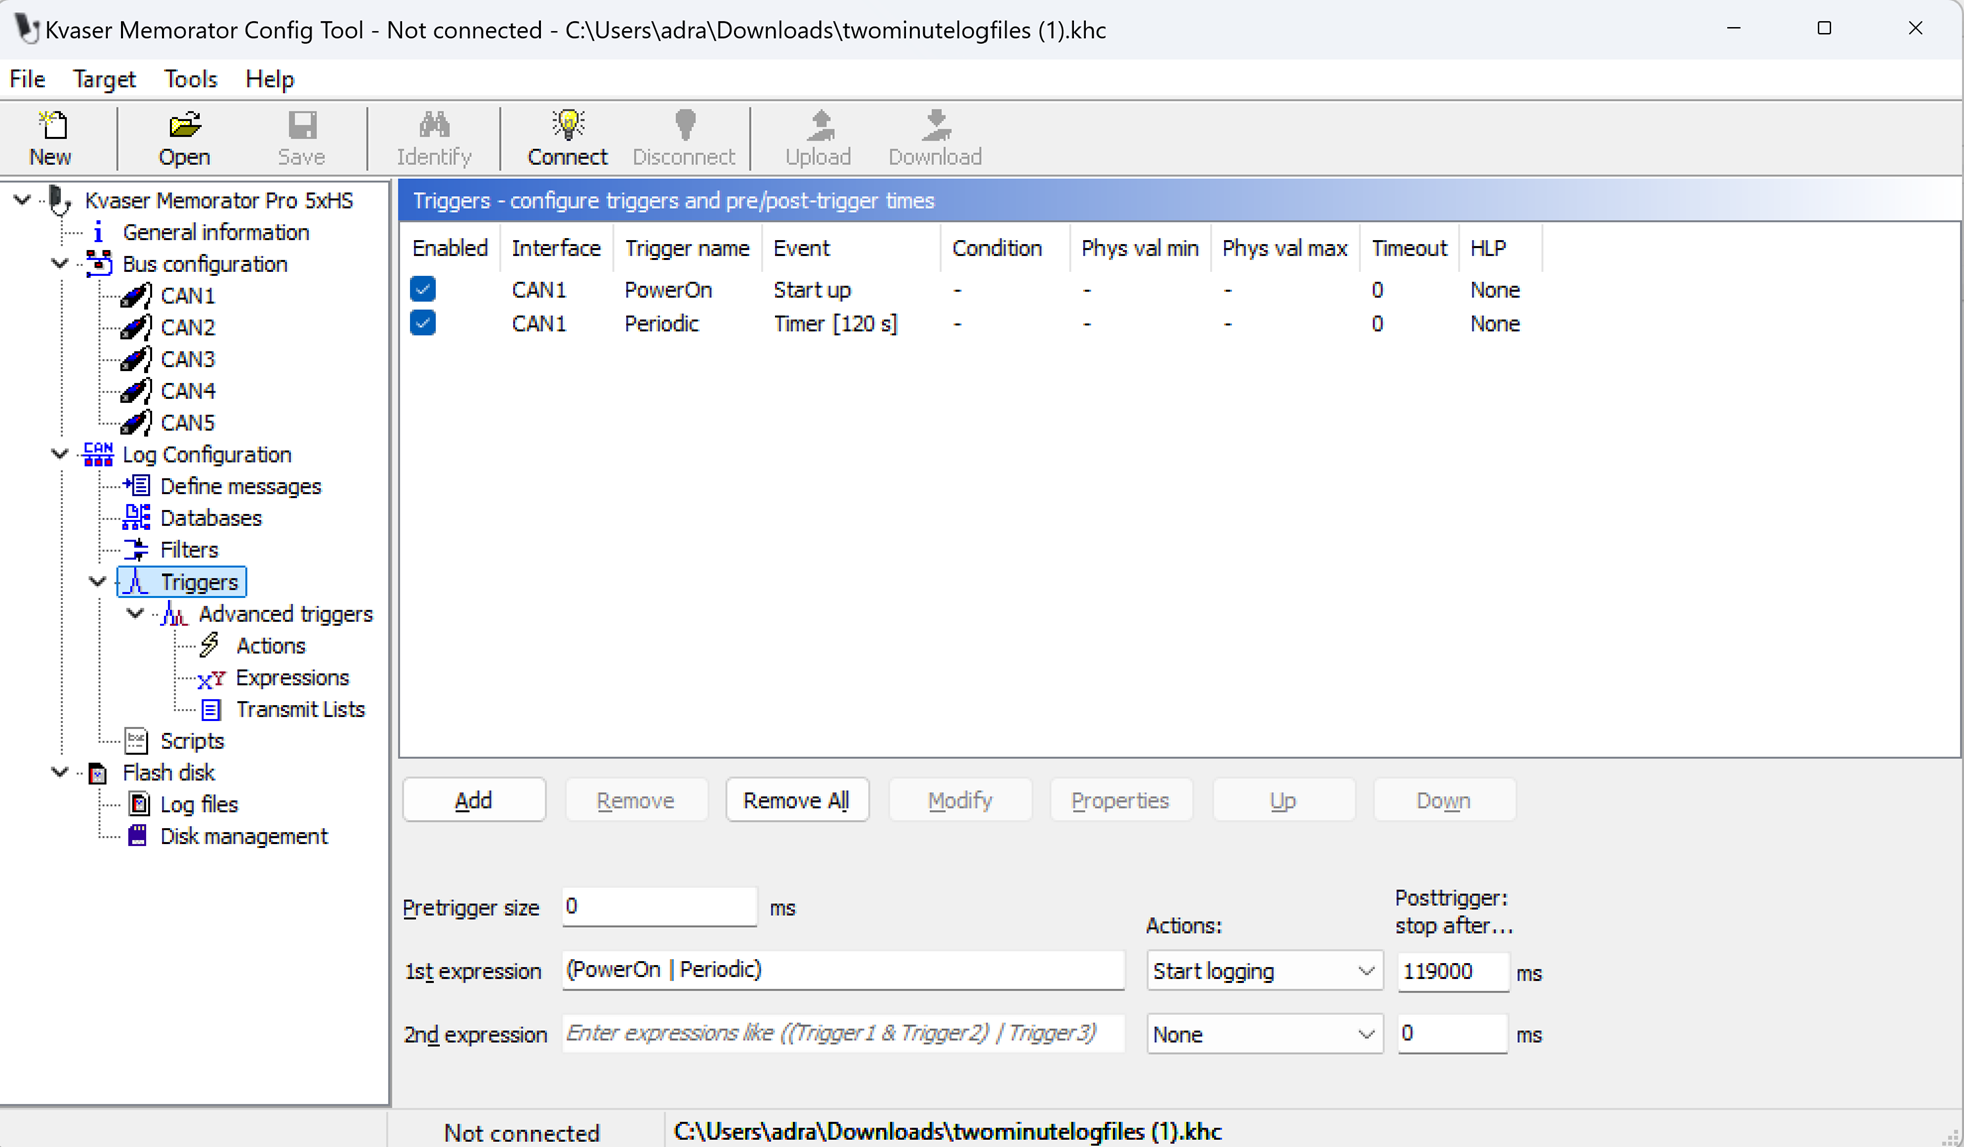
Click Finish to complete the trigger. Now we have two triggers, PowerOn and Periodic. The two triggers work together to log for 120 seconds (two minutes), stop logging, and then start logging again.

To enable the two triggers to work together, you need to create an expression to explain how the triggers will relate. In the ‘1st Expression’ field, type (PowerOn|Periodic). The Action will be StartLogging. After being triggered, the Post trigger will tell the trigger to stop after 119000 ms (119 seconds). You will want the Post trigger time to be a little smaller than the time for the Timer Event trigger (in this case, the trigger named Periodic).

What will happen is the Memorator will start when plugged in. The PowerOn will trigger and the timer for the Periodic trigger will start counting down. Because PowerOn triggered, the unit will start logging data. After logging for 119 seconds, the post trigger time will cause logging to stop. One second later, the Periodic trigger timer will have counted down causing the trigger to be true and the unit will start logging again. The post trigger time and Periodic trigger will continue to cycle stopping and starting logging.

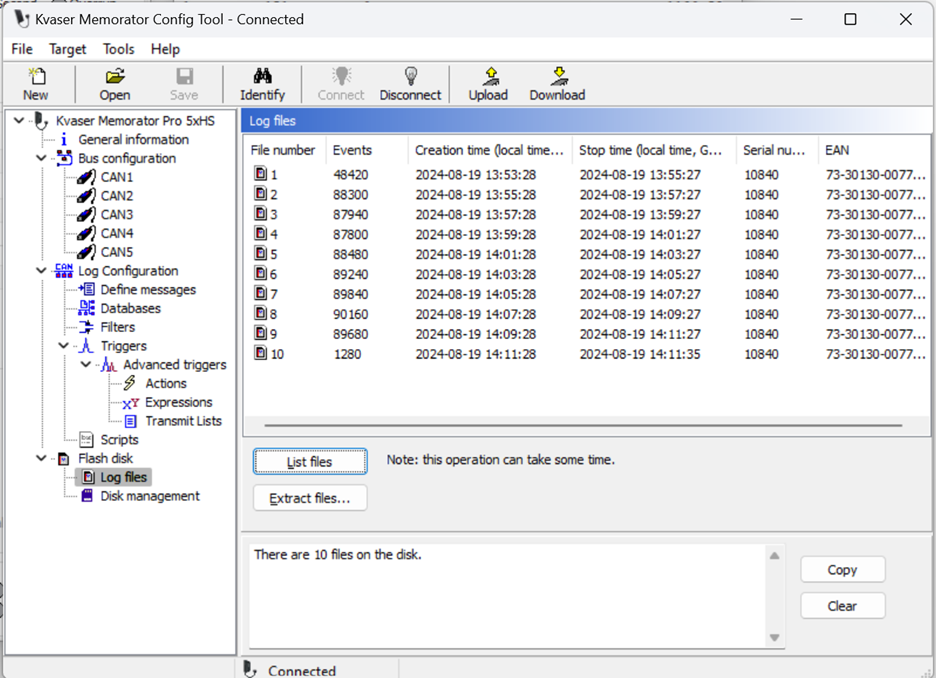
The action of stopping logging and starting again creates new log file in the log list under Log files.

What if you would like a different interval? You can always change the Timer event trigger time and the Post trigger time. Just remember, the Timer event is in seconds and the Post trigger is in milliseconds. If you wanted hour long intervals, the timing would be Timer event = 3600 seconds and the Post trigger would be 3,599,000 seconds (one second less than the Timer event).

All the settings are now complete and you can download the configuration to the Memorator.

Now when the Memorator logs, it will log for two minutes, stop logging, create a new log entry, and begin logging again. When you go to extract, you will see several log files, each five minutes long. This will allow you to choose a certain timeframe to extract, as opposed to extracting the entire log from the session and splitting the log into increments.

A drawback to this method is that there is a delay of about 1 second as the logging stops and restarts. During this period, data will be lost due to the unit not logging. If you do have a situation where you have a lot of data to log and are looking for an easier way to extract, this is still a strong option.

Author Image

Adam Raymer

Adam Raymer is a Field Applications Engineer for Kvaser AB, based near Detroit, USA. Adam regularly meets with customers and is an active member of our global support team.